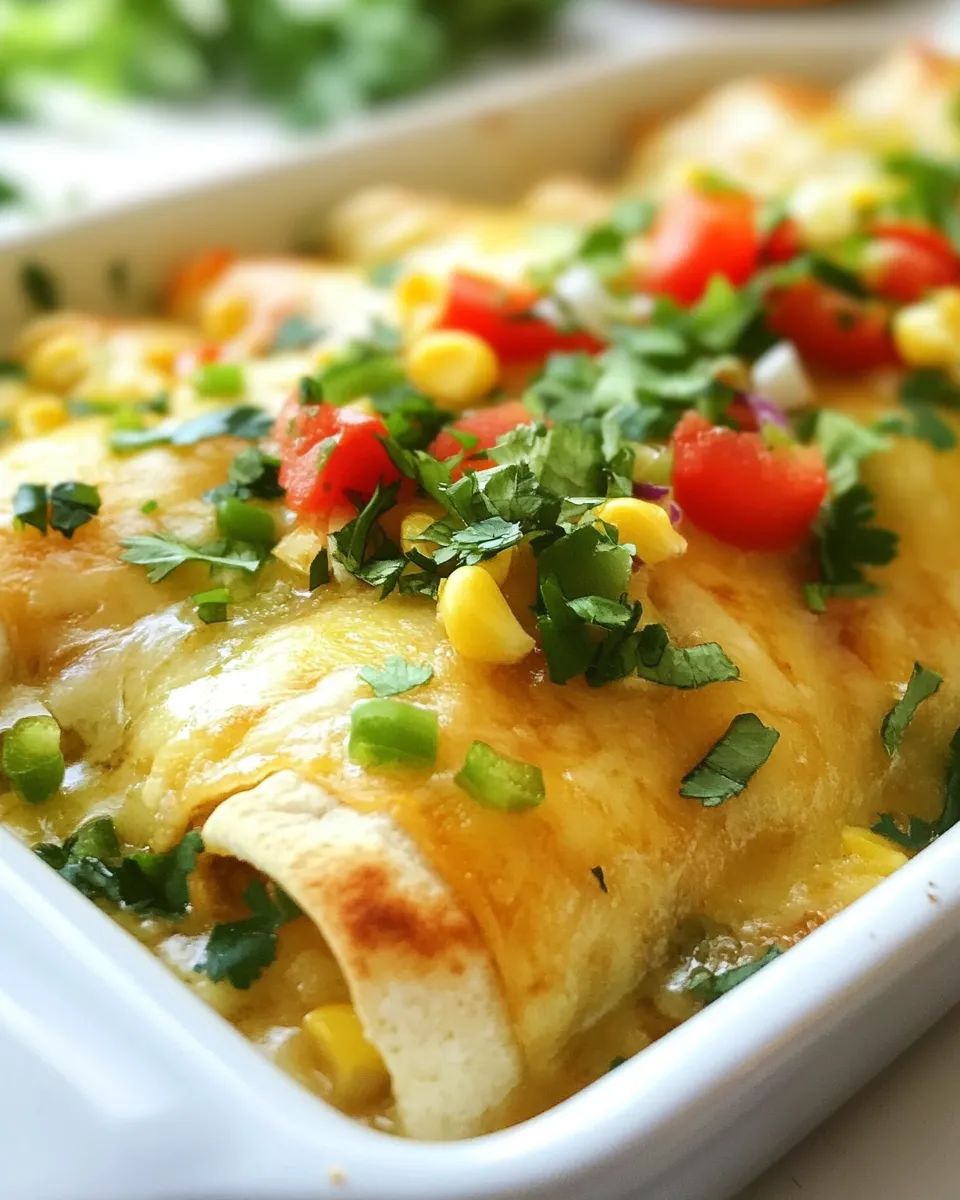
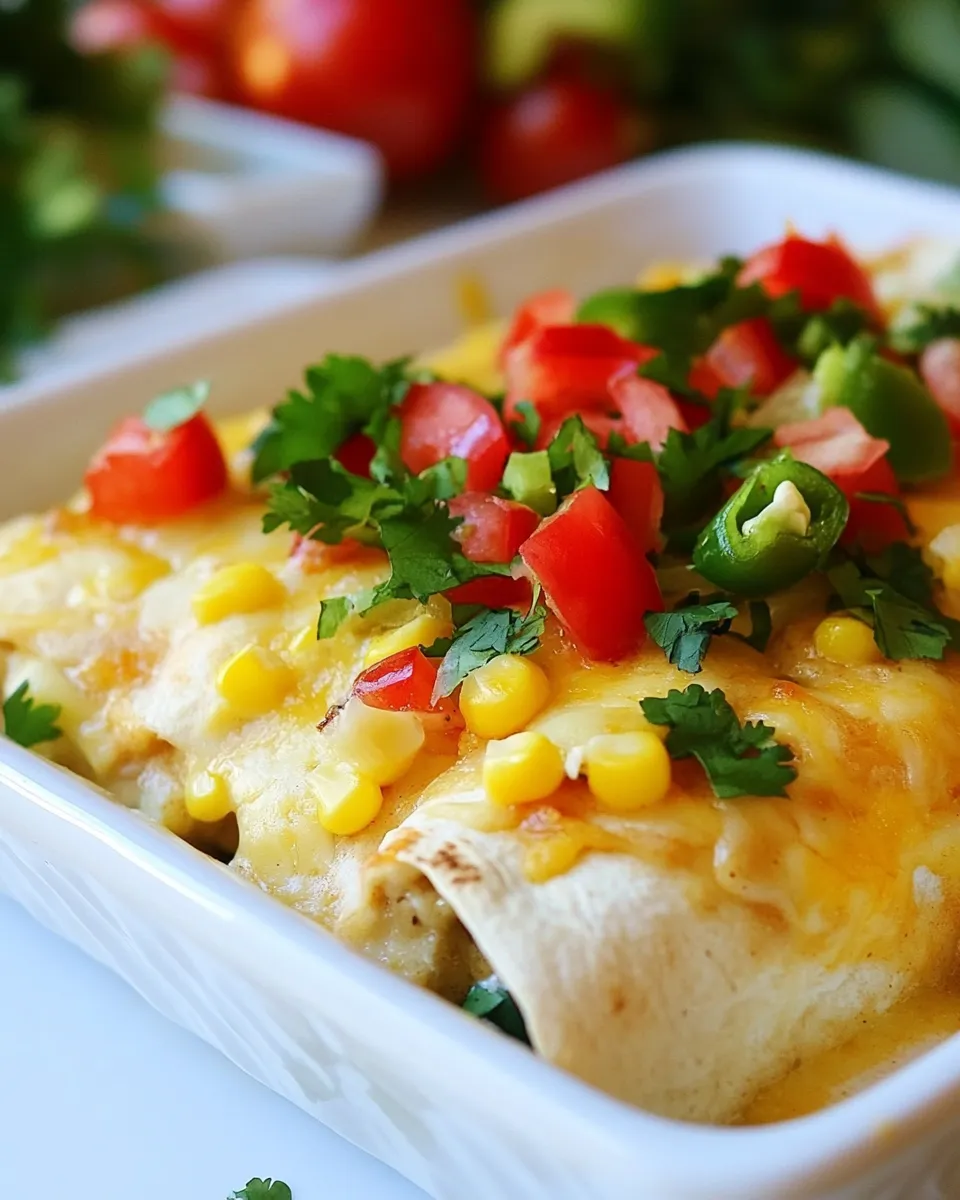
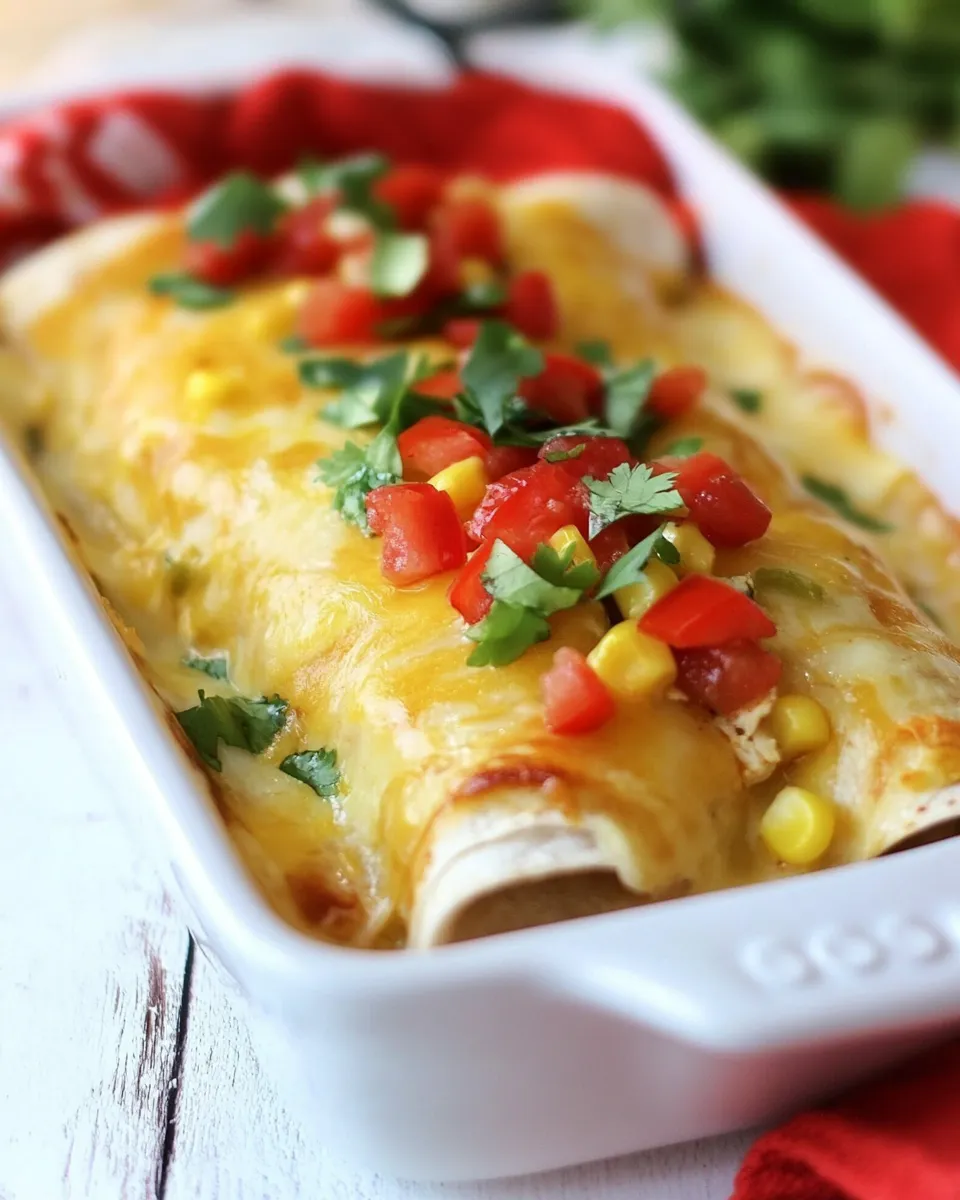
Sweet Corn and Chicken Enchiladas
Comfort food that’s bright, cheesy, and incredibly easy to pull together—these Sweet Corn and Chicken Enchiladas are one of those weeknight winners that also shines when guests drop by. The filling is a simple mix of tender shredded chicken, sweet roasted corn from a frozen steam-bag, and melty Mexican blend cheese. Two cans of green enchilada sauce keep things saucy and savory, while soft 6-inch flour tortillas wrap everything into neat little bundles. Top with salsa, sour cream, or guacamole if you like, and you have dinner on the table in about an hour with minimal fuss.
Why you’ll love this recipe

- Fast and family-friendly: uses pre-cooked shredded chicken and frozen seasoned corn to cut prep time.
- Bold flavor with very little hands-on work: green enchilada sauce does most of the seasoning for you.
- Customizable toppings: salsa, sour cream, and guacamole add freshness and creaminess.
- Cheesy, comforting, and great for leftovers—these reheat well for lunches or a second dinner.
Ingredients
- 2 cups cooked and shredded chicken
- 1 bag (11.8 oz Green Giant™ Seasoned Steamers™ frozen honey roasted sweet corn)
- 2 cups shredded Mexican blend cheese
- 2 cans (10 oz each) green enchilada sauce
- 1 package 6-inch soft flour tortillas
- Optional: salsa, sour cream, and guacamole for topping
Equipment
- Large mixing bowl
- Skillet or microwave-safe dish for heating the corn
- 9×13-inch baking dish (or similar size)
- Aluminum foil
- Spatula and spoon
Prep at a glance
Make sure your chicken is cooked and shredded, and heat the frozen corn according to the package directions so it’s warm and slightly tender. Preheat the oven to 375°F (190°C) and set out your tortillas so they’re pliable when you fill them.
Step-by-step Directions
Follow these clear, ordered steps to assemble and bake the enchiladas.
- Preheat your oven to 375°F (190°C). Lightly grease a 9×13-inch baking dish or a similar-sized casserole dish so the enchiladas won’t stick.
- Prepare the corn: Cook the Green Giant™ Seasoned Steamers™ frozen honey roasted sweet corn according to the package instructions until heated through. Drain any excess liquid if necessary and transfer the warm corn to a large mixing bowl.
- Add the chicken: Into the same large bowl with the warm corn, add 2 cups cooked and shredded chicken. Toss gently so the warm corn begins to mingle with the shredded chicken and the flavors start to combine.
- Mix in cheese and half the sauce: Add 2 cups shredded Mexican blend cheese to the bowl, reserving about 1/2 cup for the topping. Pour in one of the 10 oz cans of green enchilada sauce and stir until the mixture is evenly coated and the cheese is distributed throughout. The filling should be moist but still easy to scoop into tortillas.
- Soften the tortillas: Warm the 6-inch soft flour tortillas so they are pliable and won’t crack when you roll them. You can wrap the stack in a damp paper towel and microwave for 20–30 seconds, or warm them briefly in a skillet over low heat, flipping once.
- Assemble the enchiladas: Spoon about 2–3 tablespoons of the chicken, corn, and cheese filling onto the center of each warmed tortilla. Roll each tortilla tightly around the filling and place seam-side down in the prepared baking dish. Arrange the rolled enchiladas in rows so they fit snugly together.
- Top with sauce and cheese: Pour the remaining 1 can (10 oz) of green enchilada sauce evenly over the arranged enchiladas, making sure the tops and edges are well coated. Sprinkle the reserved shredded Mexican blend cheese (about 1/2 cup) evenly over the sauced enchiladas.
- Bake: Cover the baking dish loosely with aluminum foil and bake in the preheated oven for 15 minutes. After 15 minutes, remove the foil and bake an additional 10–12 minutes, or until the cheese on top is melted and bubbly and the sauce is heated through.
- Rest briefly and serve: Take the enchiladas out of the oven and let them sit for 5 minutes to set. This helps the filling hold together when you cut or scoop servings. Top each portion with optional salsa, sour cream, and guacamole as desired.
Troubleshooting & tips for success
- If your tortillas crack while rolling, warm them a little longer—pliable tortillas are essential to neat enchiladas.
- If the filling seems dry, stir in a tablespoon or two of the remaining green enchilada sauce before filling the tortillas.
- Use two smaller baking dishes if your enchiladas are tightly packed; this helps even baking and prevents sogginess in the center.
- To make ahead: Assemble the enchiladas in the dish, cover tightly, and refrigerate up to 24 hours. When ready to bake, add a few extra minutes to the baking time if refrigerated.
Serving suggestions
These enchiladas pair beautifully with a simple side salad of crisp greens and a lime vinaigrette, cilantro-lime rice, or refried beans. Fresh salsa, a dollop of sour cream, and slices of creamy guacamole add brightness and contrast to the warm, cheesy casserole.
Storage and reheating
Refrigerate leftovers in an airtight container for up to 3 days. Reheat individual portions in the microwave for 1–2 minutes, or warm a whole baking dish covered with foil in a 350°F (175°C) oven until heated through, about 20–25 minutes. Leftovers also freeze well—flash-freeze single portions, then store in freezer-safe containers for up to 2 months. Thaw overnight in the refrigerator before reheating.
Flavor variations
- Spicy green enchilada sauce: Stir in a pinch of cayenne or a few dashes of hot sauce before pouring the sauce over the enchiladas.
- Vegetable boost: Add sautéed bell peppers or diced zucchini to the filling for extra color and nutrition.
- Herb lift: Fold a handful of chopped fresh cilantro into the filling or sprinkle chopped cilantro on top right before serving.
- Swap the cheese: If you prefer a sharper flavor, use part pepper jack or add a sprinkle of cotija on top after baking.
Notes on the ingredients
- 2 cups cooked and shredded chicken: Use any cooked white or dark meat you already have on hand—rotisserie-style, poached, or oven-roasted all work great.
- 1 bag (11.8 oz Green Giant™ Seasoned Steamers™ frozen honey roasted sweet corn: Follow the package heating instructions before adding to the filling to ensure the corn is warm and well-seasoned.
- 2 cups shredded Mexican blend cheese: Reserve about 1/2 cup to sprinkle on top; the rest goes in the filling.
- 2 cans (10 oz each) green enchilada sauce: One can is incorporated into the filling and the second can is poured over the assembled enchiladas before baking.
- 1 package 6-inch soft flour tortillas: Warm before rolling so they won’t split.
- Optional: salsa, sour cream, and guacamole: For topping and extra freshness—use as much or as little as you like.
Shortcuts and make-ahead ideas
- Use pre-shredded rotisserie chicken to skip the cooking and shredding step.
- Cook the corn in the microwave while you preheat the oven to save time.
- Assemble enchiladas the night before and refrigerate; bake fresh the next day for an effortless dinner.
Final thoughts
These Sweet Corn and Chicken Enchiladas strike the perfect balance between sweet, savory, and creamy. They’re approachable enough for a busy weeknight but polished enough to serve to friends. The recipe leans on pantry-friendly shortcuts—pre-cooked shredded chicken, frozen seasoned corn, and canned enchilada sauce—without skimping on flavor. Once you try them, they’ll likely become part of your regular rotation when you want something comforting, cheesy, and reliably delicious.
Ready to make a pan? Gather your cooked and shredded chicken, that bag of honey roasted sweet corn, Mexican blend cheese, green enchilada sauce, and soft flour tortillas. In just a few simple steps you’ll have a golden, bubbly tray of enchiladas that’s perfect for feeding the family or packing for tomorrow’s lunch.

Sweet Corn and Chicken Enchiladas
Ingredients
- 2 cups cooked shredded chicken
- 1 bag (11.8 oz) Green Giant Seasoned Steamers frozen honey roasted sweet corn cook according to package directions
- 2 cups shredded Mexican blend cheese divided (1 cup for filling, 1 cup for topping)
- 2 cans (10 oz each) green enchilada sauce use 1/2 cup in filling and the rest for topping
- 1 package (6-inch) soft flour tortillas
- salsa optional, for topping
- sour cream optional, for topping
- guacamole optional, for topping
Instructions
- Preheat the oven to 350°F (175°C). Spray a 13x9-inch baking dish with cooking spray.
- Cook the frozen honey roasted corn according to the package directions, then drain if needed and let cool slightly.
- In a medium bowl, combine the shredded chicken, cooked corn, 1 cup of the shredded Mexican blend cheese, and 1/2 cup of the green enchilada sauce. Stir until well mixed.
- Spoon about 1/2 cup of the chicken-and-corn mixture down the center of each 6-inch flour tortilla. Roll each tortilla tightly and place seam-side down in the prepared baking dish.
- Pour the remaining enchilada sauce evenly over the rolled tortillas, then sprinkle the remaining 1 cup of shredded Mexican blend cheese on top.
- Bake in the preheated oven for 15–20 minutes, or until the cheese is melted and the enchiladas are heated through.
- Serve hot topped with optional salsa, sour cream, and guacamole.
Equipment
- 13x9-inch baking dish
- Cooking Spray
- Medium Bowl
- Measuring cup
- Oven
Notes
- Use pre-cooked shredded chicken for convenience.
- Cook the frozen corn exactly as package directs.
- Divide the cheese as instructed for best melting.
- Six-inch tortillas work well for 8 servings as listed.