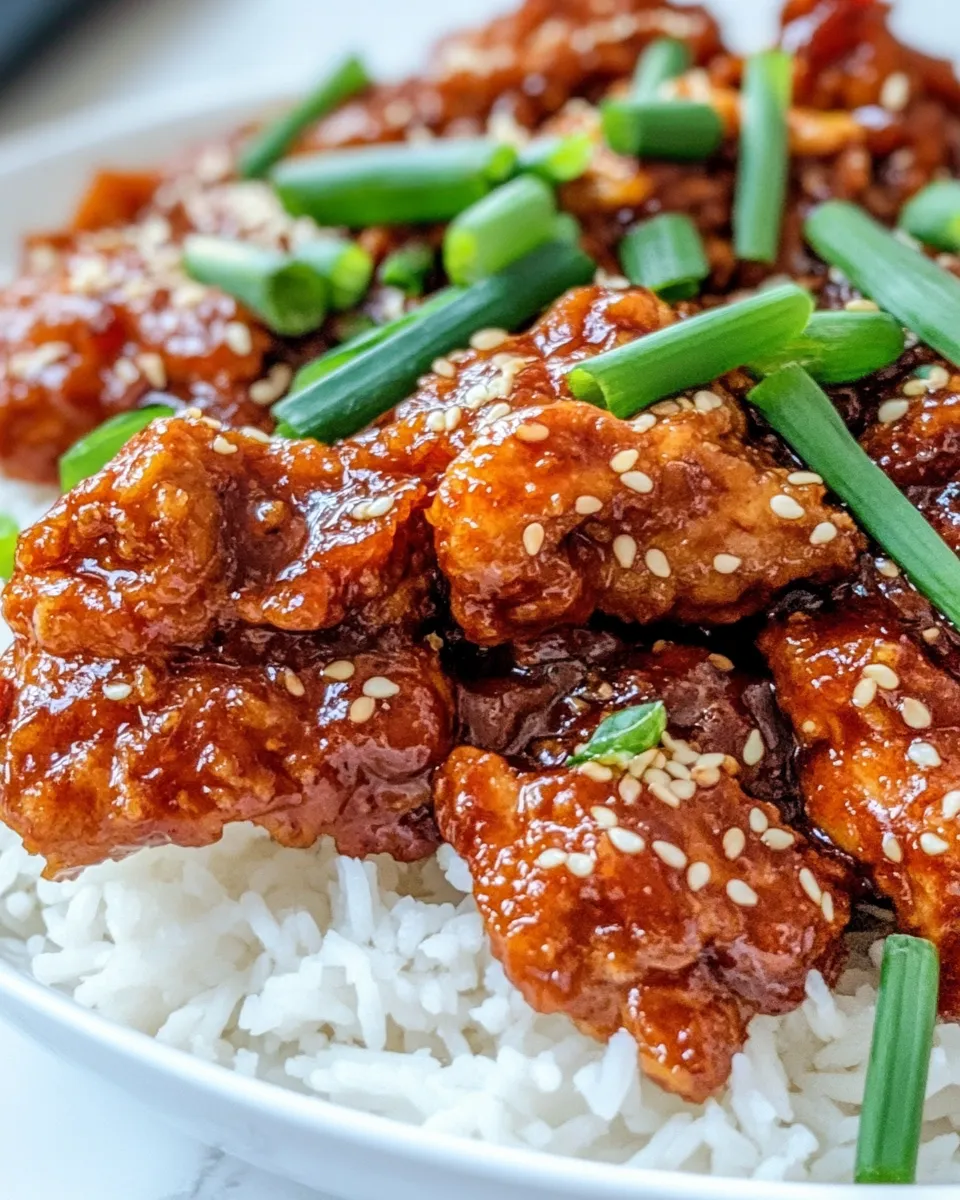
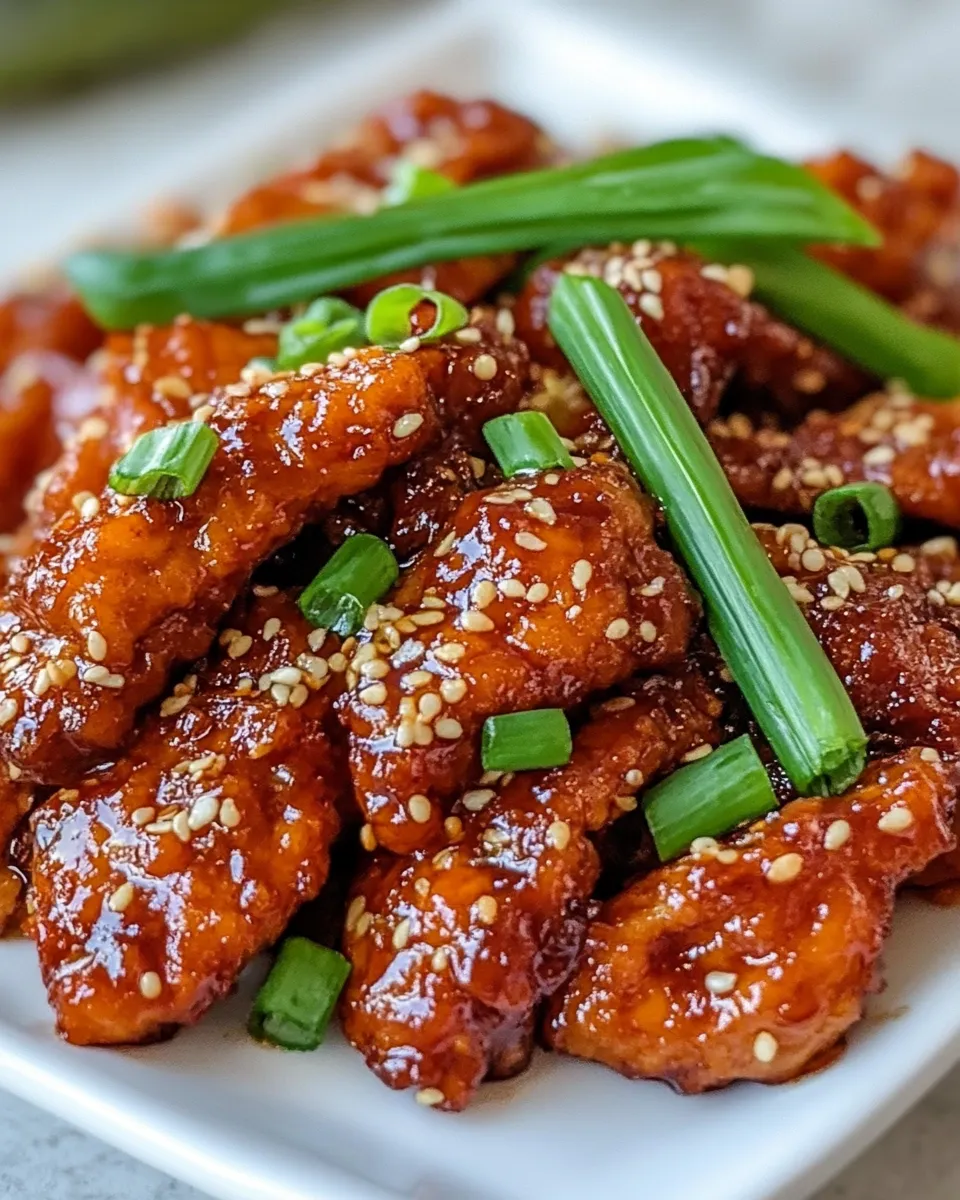
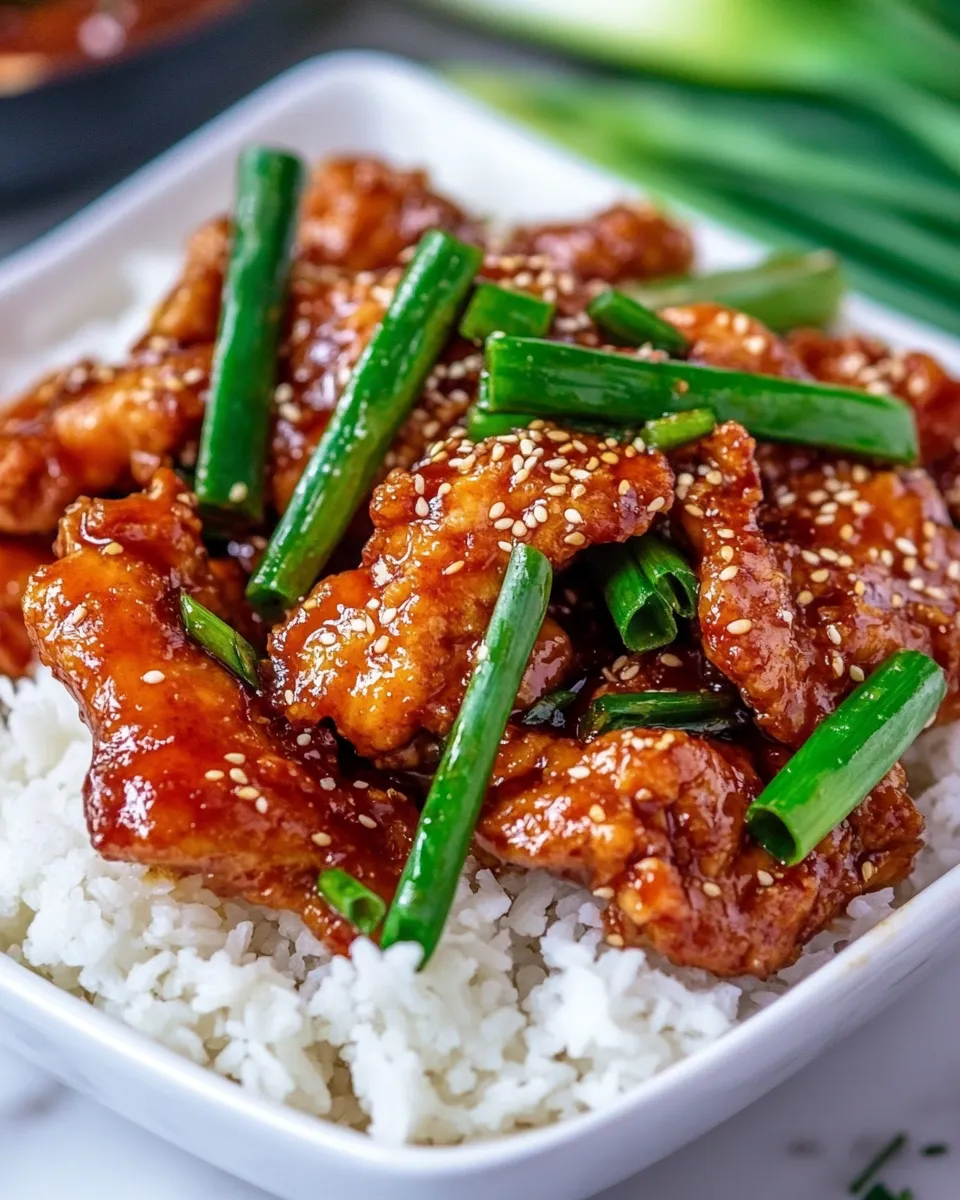
Mongolian Chicken Recipe
This Mongolian Chicken Recipe is a weeknight hero: a glossy, savory-sweet sauce clings to crisp-edged chicken strips and aromatic green onions for a bowlful of comfort. It’s inspired by the flavors you love—savory soy, deep brown sugar, bright rice vinegar, and warming ginger and garlic—pulled together in a quick stovetop meal that comes together in under 30 minutes once the chicken is prepped. The method keeps things simple and efficient, so you’ll have a restaurant-style dinner without a lot of fuss.
Why you’ll love this Mongolian Chicken Recipe
- Big, balanced flavor: sweet meets salty with a touch of heat from red pepper flakes.
- Crunchy outside, tender inside: cornstarch gives the chicken a light, crisp coating that soaks up sauce.
- Fast and family-friendly: one pan for the sauce and sautéing, plus a quick fry for the chicken.
- Easy to scale: double or halve the recipe depending on how many people you’re feeding.
Ingredients

- 2 pounds chicken, thinly sliced into 1–2 inch strips
- 1/3 cup cornstarch
- 1 cup vegetable oil
- 2 green onions, thinly sliced on diagonal into 1-inch pieces
- 1/2 cup soy sauce
- 1/2 cup dark brown sugar
- 1/2 cup water
- 1 tablespoon garlic, minced
- 1 tablespoon fresh ginger, minced
- 1/4 teaspoon red pepper flakes
- 1 tablespoon rice vinegar
- 2 teaspoons vegetable oil
- 1 teaspoon sesame seeds
Equipment
- Large bowl for tossing the chicken
- Large skillet or wok for frying and sauce
- Slotted spoon or tongs
- Paper towels and plate for draining fried chicken
- Measuring cups and spoons
Prep and timing
Total active time: about 30–35 minutes. Start by slicing the chicken into 1–2 inch strips so they cook quickly and evenly. Have the cornstarch measured and the aromatics minced before you heat the oil. The sauce can be mixed while the chicken fries so everything comes together quickly at the end.
Step-by-step instructions
- Coat the chicken: Place the 2 pounds chicken, thinly sliced into 1–2 inch strips, in a large bowl. Sprinkle the 1/3 cup cornstarch over the chicken and toss until each piece is lightly coated. A light, even dusting helps the chicken develop crisp edges when fried.
- Heat the frying oil: Pour 1 cup vegetable oil into a large skillet or wok and heat over medium-high heat. You want the oil hot enough to crisp the chicken quickly, but not smoking. To test, drop a tiny bit of cornstarch in—if it sizzles and rises, the oil is ready.
- Fry the chicken in batches: Add some of the coated chicken strips to the hot oil in a single layer, leaving space so pieces don’t stick together. Fry until the edges are crisp and the chicken registers cooked through—about 3–4 minutes per batch depending on thickness. Use a slotted spoon or tongs to transfer the fried chicken to a plate lined with paper towels to drain. Repeat until all chicken is cooked. If the oil begins to cool too much, allow it to return to temperature between batches.
- Discard excess oil, keep a little: When all the chicken is done and drained, carefully pour off most of the frying oil from the skillet, leaving about 2 teaspoons of vegetable oil in the pan. This small amount will be enough to sauté the aromatics and build the sauce without making the dish greasy.
- Sauté aromatics: Return the skillet to medium heat with the remaining 2 teaspoons vegetable oil. Add 1 tablespoon garlic, minced, and 1 tablespoon fresh ginger, minced. Stir constantly and cook for about 30–60 seconds until fragrant—do not let the garlic burn.
- Add the sauce ingredients: Pour in 1/2 cup soy sauce, 1/2 cup dark brown sugar, and 1/2 cup water. Stir to dissolve the brown sugar into the liquid. Then add 1/4 teaspoon red pepper flakes and 1 tablespoon rice vinegar. Bring the mixture to a gentle simmer so the flavors meld and the sugar fully dissolves.
- Thicken and finish the sauce: Let the sauce simmer for 2–3 minutes until it slightly reduces and thickens. It should develop a glossy texture that will cling to the chicken. If you prefer a thicker glaze, simmer a bit longer, stirring frequently so nothing sticks to the pan.
- Toss chicken with sauce: Return the fried chicken strips and the green onions—2 green onions thinly sliced on diagonal into 1-inch pieces—to the skillet. Toss everything together so the chicken and green onions are evenly coated in the glossy sauce. Heat for another 1–2 minutes so the chicken warms through and the scallions soften slightly but keep a bit of crunch.
- Garnish and serve: Remove the skillet from heat. Sprinkle 1 teaspoon sesame seeds over the top and give the dish one final toss. Serve the Mongolian Chicken Recipe immediately over steamed rice or with your favorite grain so the sauce can be soaked up on the plate.
Troubleshooting and tips
- If the chicken seems soggy after tossing in the sauce, fry it a touch longer during the initial fry so the cornstarch crust is crispier and better resists the sauce.
- To keep the chicken warm while finishing remaining batches, place fried pieces on a wire rack over a baking sheet in a 200°F oven. This keeps them crisp without steaming.
- Adjust heat by adding more or less red pepper flakes. The recipe calls for 1/4 teaspoon for a mild kick; for a noticeable heat, increase to 1/2 teaspoon or more to taste.
- If you want more glaze, make a second quick slurry by mixing 1 teaspoon cornstarch with 2 teaspoons water and stirring it into the simmering sauce. Let it cook for a minute to thicken, then toss chicken back in.
- For extra depth, add a splash of toasted sesame oil at the very end (a few drops) just before serving.
Serving suggestions
Serve this Mongolian Chicken Recipe over fragrant steamed rice or fluffy cauliflower rice for a low-carb option. It also pairs well with quick-steamed broccoli, snap peas, or bok choy for a bright, green contrast. A simple cucumber salad on the side makes for a refreshing palette cleanser.
Make-ahead and storage
Fried chicken and sauce can be made ahead and stored separately in airtight containers for up to 3 days in the refrigerator. Reheat the chicken in a hot oven on a wire rack to restore some crispness, and rewarm the sauce gently on the stovetop before tossing together to serve.
Notes on ingredients and substitutions
- If you only have light brown sugar, you can use it in place of dark brown sugar; flavor will be slightly less molasses-forward.
- If you cannot use soy sauce for dietary reasons, substitute an equal amount of a soy-free savory sauce made from tamari or coconut aminos, keeping the 1/2 cup quantity the same.
- Swapping vegetable oil for another neutral-tasting oil with a high smoke point is fine; keep timings and amounts identical.
- For a gluten-free version, use a gluten-free soy sauce or tamari in the same 1/2 cup amount.
Nutrition (approximate per serving)
Nutrition depends on portion size and any sides. This Mongolian Chicken Recipe is protein-forward and sauce-rich; serving over rice will increase carbohydrate content. For a lighter plate, serve over steamed vegetables.
Final thoughts
This Mongolian Chicken Recipe delivers bold, caramelized flavors with a satisfying contrast between crisped cornstarch-coated chicken and a silky, fragrant sauce. It’s a great choice when you want something a little special but don’t have hours to cook. With minimal prep and clear steps, it’s accessible for cooks of any level and easy to adapt to taste preferences. Give it a go on a busy weeknight or whenever you’re craving a saucy, comforting bowl of dinner that’s ready in a flash.
Mongolian Chicken Recipe
Ingredients
- 2 pounds chicken thinly sliced into 1–2 inch strips
- 1/3 cup cornstarch
- 1 cup vegetable oil for frying
- 2 stalks green onions thinly sliced on diagonal into 1-inch pieces
- 1/2 cup soy sauce
- 1/2 cup dark brown sugar
- 1/2 cup water
- 1 tablespoon garlic minced
- 1 tablespoon fresh ginger minced
- 1/4 teaspoon red pepper flakes
- 1 tablespoon rice vinegar
- 2 teaspoons vegetable oil for sauce (added to saucepan)
- 1 teaspoon sesame seeds
Instructions
- In a medium saucepan over low–medium heat, add 2 teaspoons vegetable oil, then sauté the minced garlic and minced ginger for about 30 seconds until fragrant.
- Whisk in the brown sugar, red pepper flakes, soy sauce, rice vinegar, and water; simmer and stir until the sauce slightly thickens, about 5–10 minutes. Remove from heat and set aside.
- Place the sliced chicken in a large bowl and toss with the cornstarch until pieces are evenly coated.
- Heat 1 cup vegetable oil in a large skillet or deep pan over medium–high heat until hot. Fry the coated chicken in batches until browned and cooked through, about 1–2 minutes per batch. Stir so pieces cook evenly.
- Transfer cooked chicken to a paper towel–lined plate to drain and discard the frying oil when finished.
- Return the skillet to medium heat, add the chicken back in, pour the prepared sauce over the chicken, and cook, stirring, until the sauce thickens and coats the chicken, about 2–3 minutes.
- Stir in the sliced green onions, sprinkle with sesame seeds, and serve immediately over rice.
Equipment
- Medium Saucepan
- Large Bowl
- Large Skillet or Deep Pan
- Paper Towels
- Whisk
Notes
- Use a thermometer or small test piece to ensure oil is hot before frying.
- Fry chicken in batches to avoid overcrowding the pan.
- Adjust red pepper flakes to control heat level.
- Serve immediately for best texture.