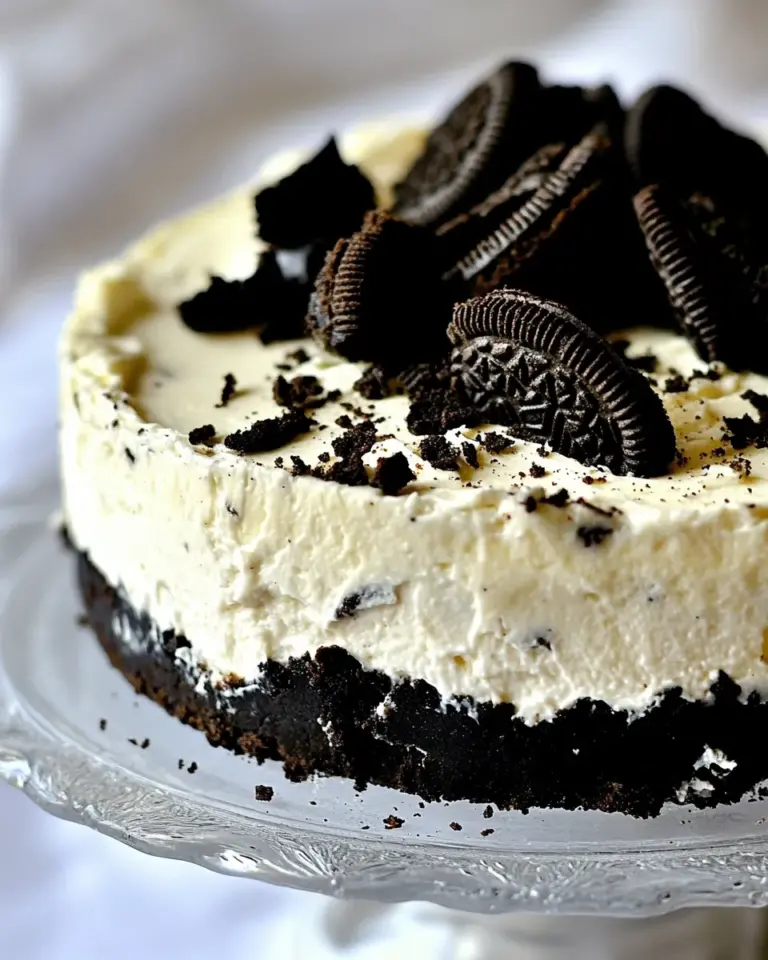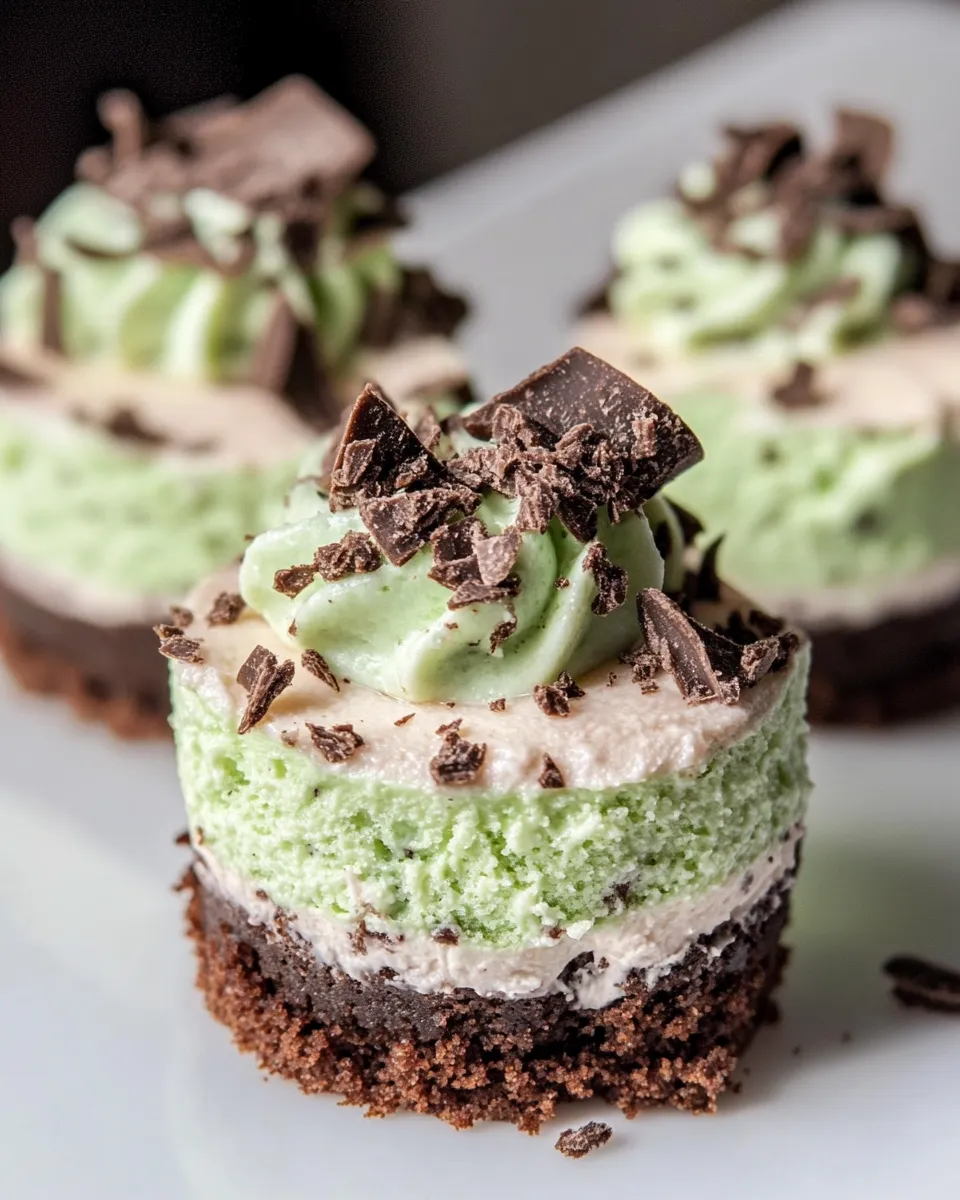
Mini Mint Cheesecake
I love recipes that look special but come together without drama. These mini mint cheesecakes dress up any coffee table or party platter and they’re perfectly portioned, so guests can grab one without committing to a full slice. The mint flavor is bright and refreshing, tempered by white chocolate and a fudgy chocolate whipped cream crown.
There’s nothing fussy here—just a simple cookie crust, a silky mint-infused filling, a quick chill, and a bit of piping. I’ll walk you through the exact steps I follow, explain why each ingredient matters, and share practical tips so your minis set perfectly every time.
If you like handheld desserts that taste like the holidays but feel fresh, these are for you. Make a batch for a week of treats or a crowd; they travel well and hold their shape. Let’s get into the pantry lineup and the step-by-step plan.
The Ingredient Lineup

Ingredients
- 1½ cups mint Oreo cookie crumbles (about 20 cookies) — Forms the base; mint Oreos give both texture and minty backbone.
- ⅜ cup granulated sugar — Sweetens and helps bind the crust for a firmer bite.
- 3 tablespoons salted butter (melted) — Binds the crumbs and adds richness; salted is fine here for balance.
- 1 cup white chocolate chips (melted and cooled) — Adds creaminess and sweetness to the filling; cool before adding so eggs won’t cook.
- 16 ounces cream cheese (softened) — The base of the filling; room temperature ensures a lump-free batter.
- ⅔ cups granulated sugar — Sweetens the filling; measured separately from the crust sugar.
- 1 teaspoon peppermint extract — Primary source of mint flavor—use the specified amount and taste as you go.
- 1 teaspoon vanilla extract — Rounds and deepens the flavor profile.
- ½ cup sour cream — Adds tang and silkiness; it keeps the texture tender after baking.
- 2 eggs — Provide structure; add them one at a time to avoid overmixing.
- 1 to 2 drops gel-based green food coloring — Optional, for that pretty pale-green hue without watering down the batter.
- 6 mint Oreo cookies (finely chopped) — Folded in for surprising cookie bits and a concentrated mint hit.
- 2 cups heavy whipping cream — Whipped for the chocolate topping; chill the bowl and beaters for best volume.
- 4 tablespoons cocoa powder — Gives the whipped cream a true chocolate flavor without melting it.
- 6 tablespoons powdered sugar — Sweetens and stabilizes the whipped cream.
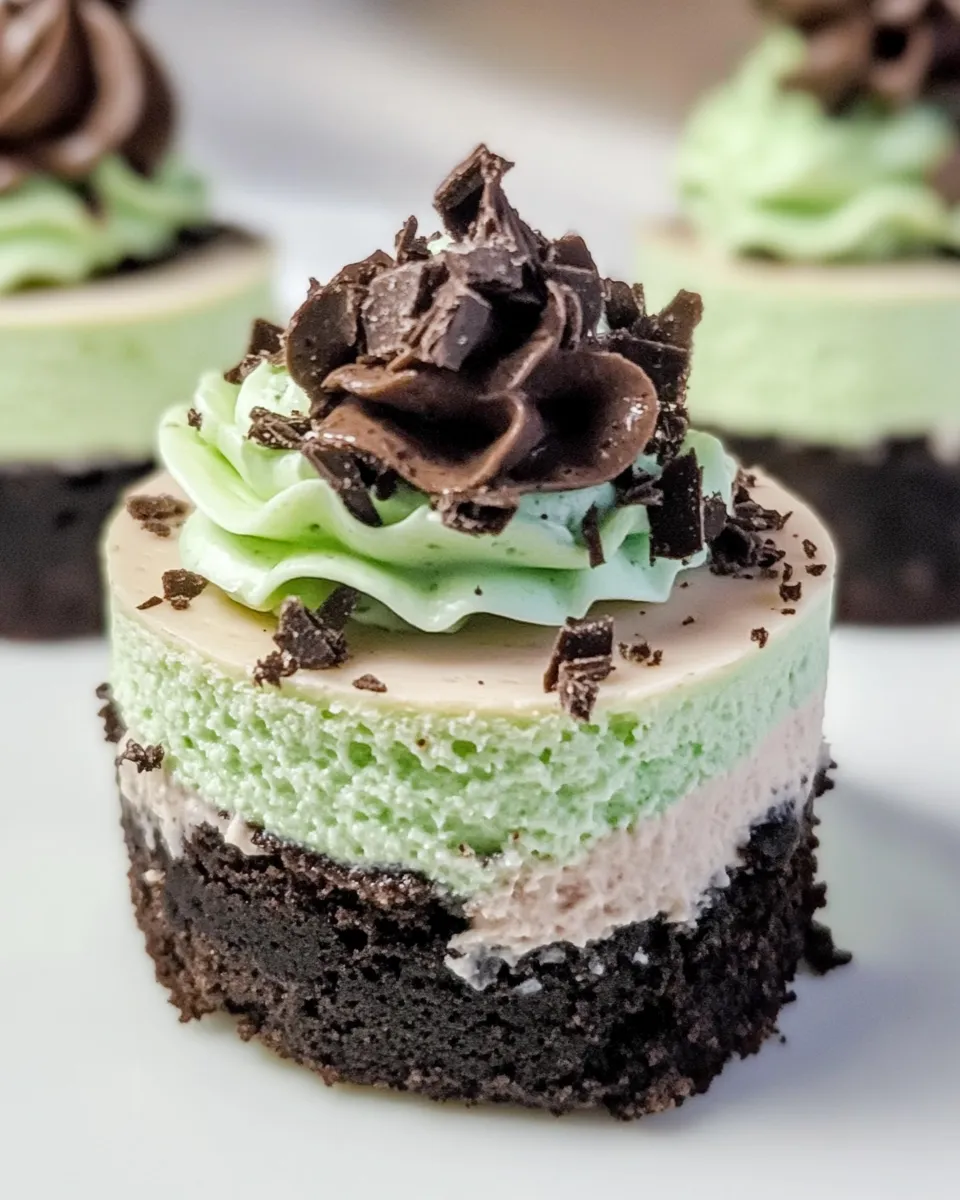
- 18 Andes mints (for decorating) — One per mini; they add mint-chocolate contrast and a polished finish.
Cook Mini Mint Cheesecake Like This
- Preheat the oven to 325°F. Line mini muffin tins with cupcake liners.
- Melt 1 cup white chocolate chips in a small microwave-safe bowl in 30-second increments, stirring between each interval, until smooth. Set aside to cool.
- Make the crust: in a medium bowl stir together 1½ cups mint Oreo cookie crumbles, ⅜ cup granulated sugar, and 3 tablespoons melted butter until evenly moistened. (If your Oreos are not already crumbled, pulse them in a food processor or crush them in a sealed bag.)
- Divide the crust mixture among the prepared liners—about 1 tablespoon of crumbs per cavity. Press the crumbs firmly and evenly into the bottom of each liner using the bottom of a measuring cup or a small mallet.
- In a large bowl, beat 16 ounces softened cream cheese with an electric mixer until smooth and fluffy.
- Add ⅔ cups granulated sugar, 1 teaspoon peppermint extract, and 1 teaspoon vanilla extract to the cream cheese. Beat until fully combined and smooth.
- Beat in the cooled melted white chocolate and ½ cup sour cream until incorporated. Taste to confirm the mint flavor.
- Add the 2 eggs, one at a time, stirring by hand after each egg until just combined.
- Add 1 to 2 drops gel-based green food coloring and stir by hand until the color is evenly distributed.
- Fold in 6 finely chopped mint Oreo cookies.
- Spoon the cheesecake mixture over the packed Oreo crusts, filling each cup almost to the top.
- Bake at 325°F for 20 minutes, or until the cheesecakes are set and dry to the touch on top.
- Remove from the oven and let the cheesecakes cool to room temperature (about 30 minutes). Then transfer the pan to the refrigerator and chill for 1 to 2 hours to firm.
- Make the chocolate whipped cream: in a chilled mixing bowl whip 2 cups heavy whipping cream with 4 tablespoons cocoa powder and 6 tablespoons powdered sugar until stiff peaks form.
- Pipe or spoon the chocolate whipped cream onto each chilled mini cheesecake and top each with an Andes mint (use the 18 Andes mints for decorating).
Why You’ll Keep Making It

These minis hit a comforting sweet spot: familiar Oreo crunch, a creamy mint cheesecake center, and a chocolate-swirled finish. They’re small but impressive—ideal when you want to serve something homemade without the fuss of slicing and plating a whole cake.
The recipe scales well and stays reliable across ovens. The white chocolate stabilizes the filling and gives it a luxuriously smooth mouthfeel. The mint extract is concentrated, so a teaspoon goes a long way; you’ll get clean mint notes without medicinal aftertaste if you stick to the amount and taste before adding more.
Flavor-Forward Alternatives
Want to tweak the profile? Try one of these swaps or additions. Each keeps the technique the same and tweaks only flavor elements.
- Chocolate crust: Use chocolate Oreos instead of mint Oreos for a deeper cocoa base and skip the chopped mint Oreos in the filling.
- Dark chocolate swirl: Fold 2 tablespoons of melted dark chocolate into half the batter, then swirl for marbled minis.
- Mocha mint: Add 1 teaspoon instant espresso powder to the chocolate whipped cream to give a coffee lift that pairs beautifully with mint.
- Mint intensity: If you prefer a gentler mint, reduce peppermint extract to ½ teaspoon; for a bold pop, keep to 1 teaspoon but verify with a taste before baking.
- No white chocolate: You can omit the melted white chocolate, but expect a slightly less glossy finish and a lighter mouthfeel.
Gear Up: What to Grab
Tools make a difference. For these minis I reach for:
- Mini muffin tin and paper liners—use sturdy liners to support the crumb base.
- Electric mixer—handheld or stand mixer to get perfectly smooth cream cheese.
- Small microwave-safe bowl—for melting white chocolate without seizing.
- Measuring spoons and cups—accurate measures matter for texture.
- Chilled bowl and beaters—for whipping cream to stiff peaks efficiently.
- Offset spatula or spoon—for filling cups evenly; a piping bag makes topping neat.
Steer Clear of These
A few common missteps will derail texture or flavor. Avoid these:
- Cold cream cheese: Don’t start with refrigerator-cold cream cheese. It leads to lumps and overmixing.
- Hot white chocolate: Let it cool fully before adding. Hot chocolate can cook eggs or thin the batter too much.
- Overbaking: The minis finish firming as they cool. Pull them when the tops are just set, not browned.
- Skipping the chill: A short chill is essential. Without it, the filling won’t firm and the topping will slide.
Warm & Cool Weather Spins
These minis adapt well to seasons. In warmer months, keep them chilled right up until serving and move them in batches from fridge to plate. In cooler weather, you can add cozy elements.
- Summer: Serve chilled, arrange on a cold platter, and keep extras under a cold towel or in a cooler if outdoors.
- Winter: Add a dusting of cocoa or a light caramel drizzle over the whipped cream for a richer finish.
- Holiday option: Garnish with crushed candy canes (lightly) mixed into the whipped cream for a peppermint crunch that complements the mint Oreo.
Cook’s Notes
Texture and timing matter. Here are practical notes I’ve learned over many batches:
- Room temperature ingredients: Let cream cheese and eggs sit at room temp for about 30–60 minutes before starting.
- Crumb packing: Firmly pack the crust to prevent soggy bottoms and to give the minis a satisfying snap when you bite in.
- Mix sparingly once eggs are added: Stir by hand after each egg just until combined to avoid incorporating too much air, which can cause cracking.
- Chill time: One hour will set them, but two hours is ideal for firm slices and easier topping.
Meal Prep & Storage Notes
These travel and store well. Follow these quick guidelines:
- Refrigerate: Store finished cheesecakes in an airtight container in the fridge for up to 4 days. Add the Andes mints just before serving if you prefer them crisp.
- Freeze: You can freeze un-topped minis (after baking and cooling) for up to 1 month. Thaw in the fridge overnight, then whip fresh cream for topping.
- Transport: Keep chilled in a cooler for events. Place minis in a single layer or use cupcake carriers to avoid tipping.
Mini Mint Cheesecake FAQs
Q: Can I make full-size cheesecakes with this batter?
A: Yes. Multiply the yield and adjust bake time—full-size cheesecakes require lower temperature and longer bake time; watch for a slightly jiggly center. This mini recipe is optimized for 20–24 small cups.
Q: My white chocolate seized—what now?
A: If it becomes grainy, gently stir in a small splash of neutral oil or warm cream (a teaspoon at a time) off heat to smooth it, then cool before adding to the batter.
Q: The whipped cream wept—how to prevent that?
A: Use a chilled bowl and cold cream, and make sure powdered sugar is fully incorporated. Pipe or serve right after whipping; adding a teaspoon of cornstarch per cup of cream can help stabilize for longer holding.
Q: Can I skip the green food coloring?
A: Absolutely. The color is optional and won’t affect flavor or texture.
In Closing
Mini Mint Cheesecake is one of those desserts that looks like a lot of work but delivers consistent results with straightforward steps. Follow the ingredient list and the bake-and-chill timing, and you’ll have pretty, portable desserts that taste richer than their size suggests. Make them ahead for stress-free entertaining, and don’t be afraid to try one of the flavor variations to make the recipe your own.
Let me know how yours turn out and any twists you tried—I always love hearing which versions become favorites at home.

Mini Mint Cheesecake
Ingredients
Ingredients
- 1 1/2 cupsmint Oreo cookie crumbles about 20 cookies
- 3/8 cupgranulated sugar
- 3 tablespoonssalted butter melted
- 1 cupwhite chocolate chips melted and cooled
- 16 ouncescream cheese softened
- 2/3 cupsgranulated sugar
- 1 teaspoonpeppermint extract
- 1 teaspoonvanilla extract
- 1/2 cupsour cream
- 2 eggs
- 1 to 2 drops gel-based green food coloring
- 6 mint Oreo cookies finely chopped
- 2 cupsheavy whipping cream
- 4 tablespoonscocoa powder
- 6 tablespoonspowdered sugar
- 18 Andes mints for decorating
Instructions
Instructions
- Preheat the oven to 325°F. Line mini muffin tins with cupcake liners.
- Melt 1 cup white chocolate chips in a small microwave-safe bowl in 30-second increments, stirring between each interval, until smooth. Set aside to cool.
- Make the crust: in a medium bowl stir together 1½ cups mint Oreo cookie crumbles, ⅜ cup granulated sugar, and 3 tablespoons melted butter until evenly moistened. (If your Oreos are not already crumbled, pulse them in a food processor or crush them in a sealed bag.)
- Divide the crust mixture among the prepared liners—about 1 tablespoon of crumbs per cavity. Press the crumbs firmly and evenly into the bottom of each liner using the bottom of a measuring cup or a small mallet.
- In a large bowl, beat 16 ounces softened cream cheese with an electric mixer until smooth and fluffy.
- Add ⅔ cups granulated sugar, 1 teaspoon peppermint extract, and 1 teaspoon vanilla extract to the cream cheese. Beat until fully combined and smooth.
- Beat in the cooled melted white chocolate and ½ cup sour cream until incorporated. Taste to confirm the mint flavor.
- Add the 2 eggs, one at a time, stirring by hand after each egg until just combined.
- Add 1 to 2 drops gel-based green food coloring and stir by hand until the color is evenly distributed.
- Fold in 6 finely chopped mint Oreo cookies.
- Spoon the cheesecake mixture over the packed Oreo crusts, filling each cup almost to the top.
- Bake at 325°F for 20 minutes, or until the cheesecakes are set and dry to the touch on top.
- Remove from the oven and let the cheesecakes cool to room temperature (about 30 minutes). Then transfer the pan to the refrigerator and chill for 1 to 2 hours to firm.
- Make the chocolate whipped cream: in a chilled mixing bowl whip 2 cups heavy whipping cream with 4 tablespoons cocoa powder and 6 tablespoons powdered sugar until stiff peaks form.
- Pipe or spoon the chocolate whipped cream onto each chilled mini cheesecake and top each with an Andes mint (use the 18 Andes mints for decorating).
Equipment
- mini muffin tins
- Cupcake Liners
- Microwave-safe bowl
- food processor or resealable plastic bag
- Measuring cup
- small mallet or bottom of a measuring cup
- Electric Mixer
- Mixing Bowls
- chilled mixing bowl