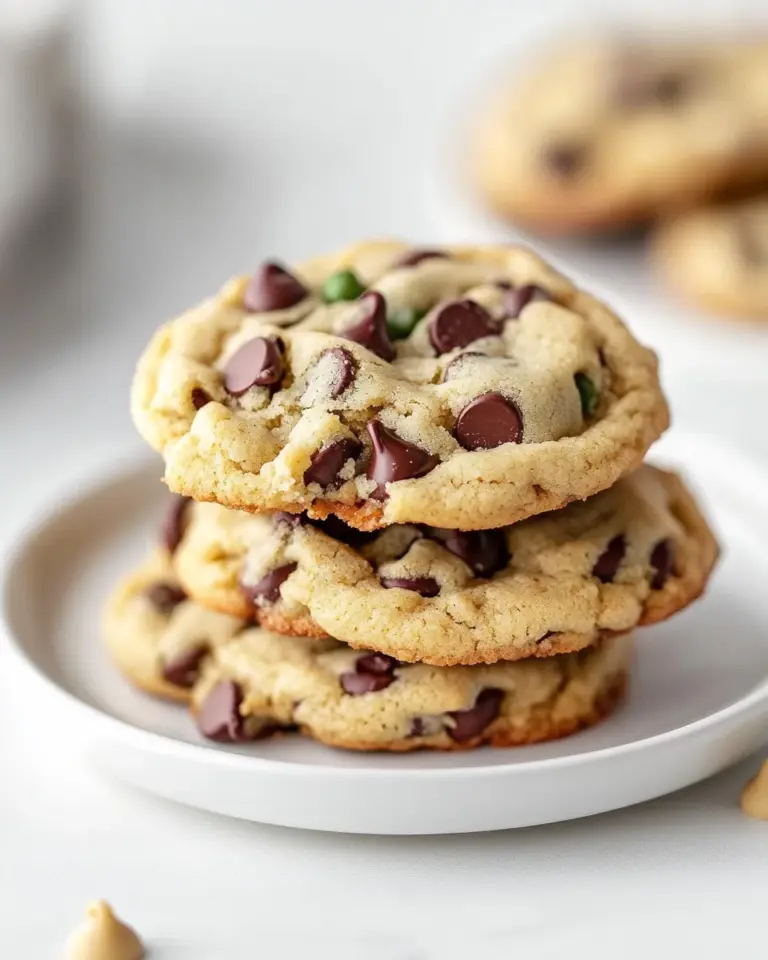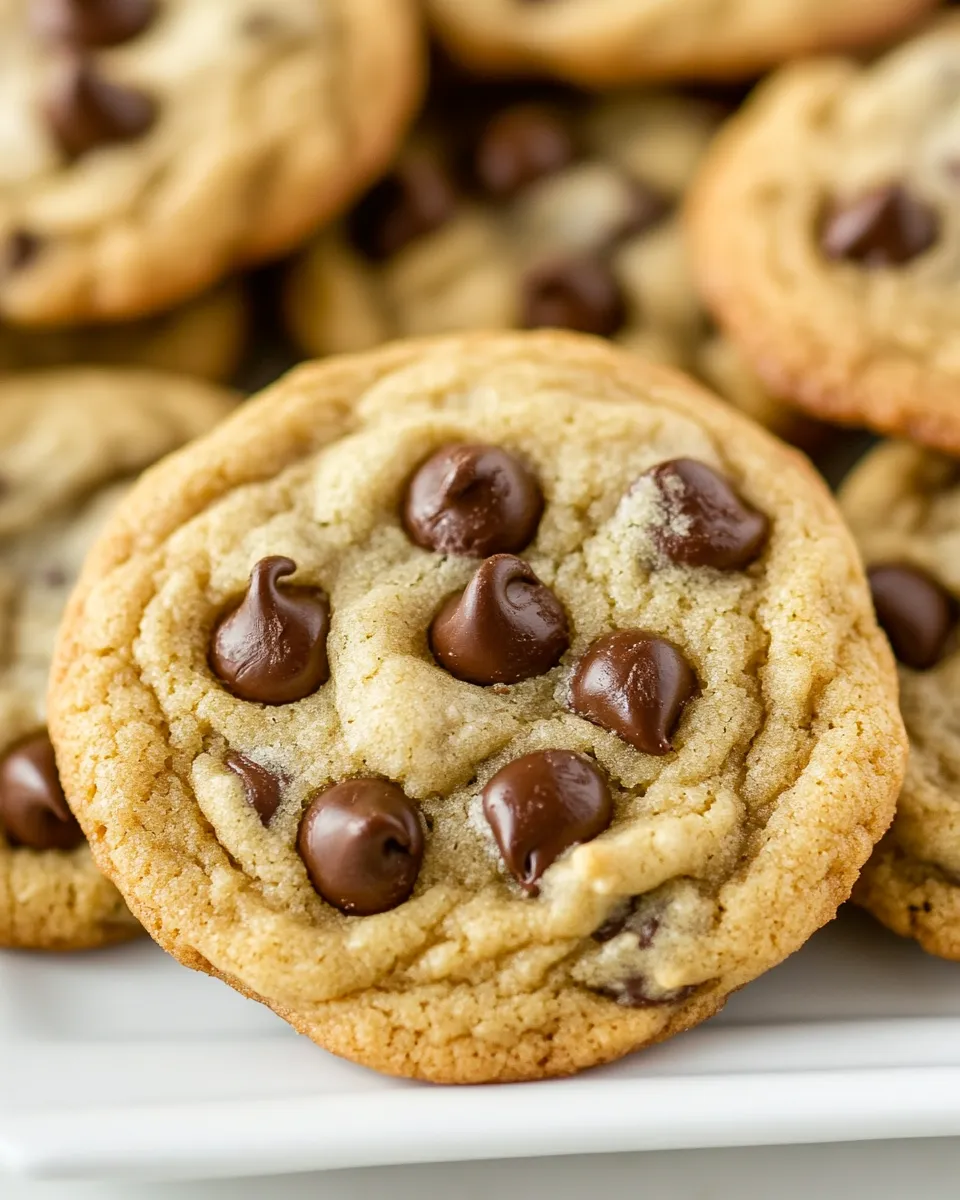
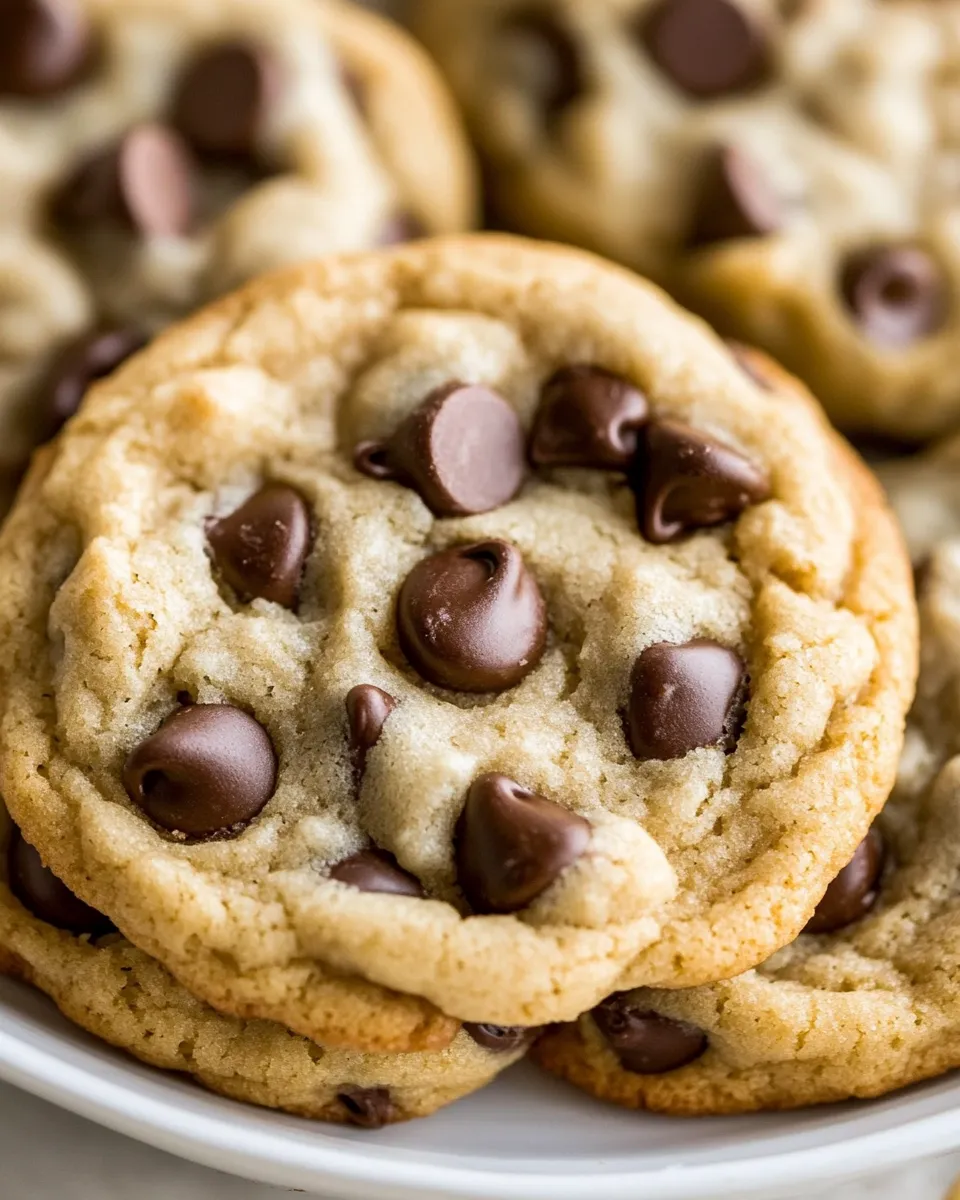
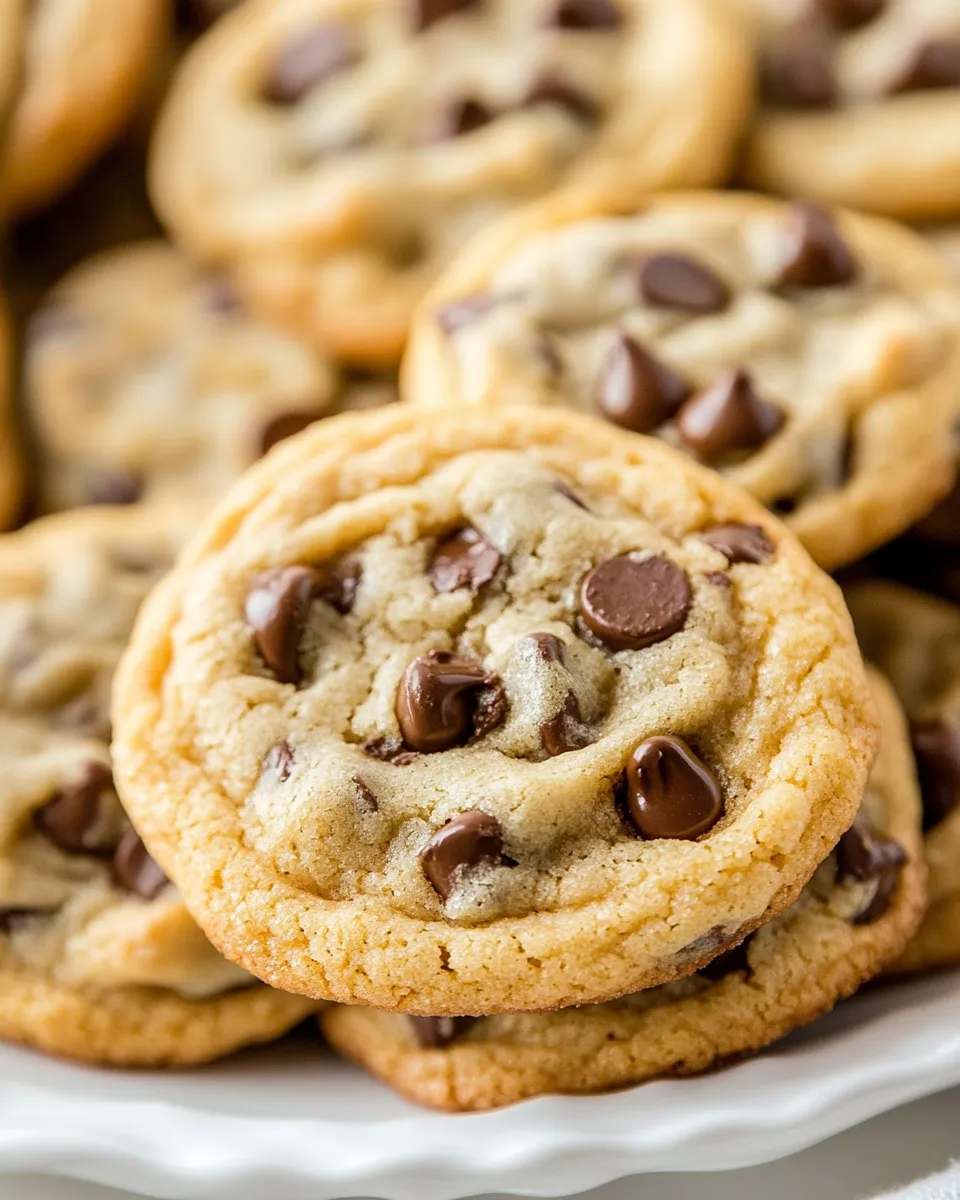
Chocolate Chip Cookies
These chocolate chip cookies are the sort I make when I want something comforting, fast, and unfussy. They’re a crowd-pleaser: slightly crisp at the edges, tender inside, and loaded with dark chocolate so every bite feels indulgent without being fussy. The method is straightforward and reliable, and the dough benefits from a short chill for better texture and flavor.
I keep this recipe in heavy rotation because it balances speed and control. Melted butter and a mix of brown and granulated sugar give great chew without needing fancy ingredients. The dough is forgiving — whether you chill it for 30 minutes or a full day, you still get excellent cookies, just with slightly different shapes.
Below you’ll find the ingredient list (exact amounts used), the method copied in order so nothing gets lost, and practical tips I use in my kitchen to rescue a batch or push things toward a softer or crisper cookie depending on what I want.
Ingredients

- 2 cups all-purpose flour, spooned and leveled — The structure for the cookie; spooning prevents packing and keeps the measurement accurate.
- 1 teaspoon baking soda — Provides lift and lightness; make sure it’s fresh for best rise.
- 1 teaspoon sea salt — Brings out sweetness and balances the chocolate; use fine sea salt if possible so it distributes evenly.
- ¾ cup unsalted butter, 1½ sticks, melted and cooled slightly — Melted butter yields a chewier texture and concentrates flavor; cool slightly so it doesn’t cook the eggs.
- ½ cup packed brown sugar — Adds moisture and chew; packed means press it into the cup for an accurate amount.
- ½ cup granulated sugar — For spread and crisp edge balance; the combination with brown sugar gives that classic texture.
- 1 large egg — Binds and contributes to structure and moisture.
- 1 large egg yolk — Extra richness and chew without making the cookie cake-like.
- 2 teaspoons vanilla extract — Rounds and deepens the flavor; real vanilla makes a difference.
- 1 heaping cup dark chocolate chips — The star flavor; a heaping cup ensures pockets of melty chocolate in every bite.
What to Buy
Shop with a short list: all-purpose flour, baking soda, sea salt, unsalted butter, brown sugar, granulated sugar, eggs, vanilla extract, and dark chocolate chips. Buy a real stick of unsalted butter (1½ sticks for the recipe). If you bake often, keep a box of baking soda and a small jar of vanilla on hand — they don’t go bad quickly and they elevate simple cookies.
If you prefer slightly chunkier chocolate bits, buy a bag of dark chocolate chips and a bar of good dark chocolate to chop. For best storage, choose resealable bags or a small airtight container for leftover cookies.
The Method for Chocolate Chip Cookies
- In a medium bowl, whisk together 2 cups all-purpose flour (spooned and leveled), 1 teaspoon baking soda, and 1 teaspoon sea salt.
- In a large bowl, whisk together 3/4 cup melted and slightly cooled unsalted butter, 1/2 cup packed brown sugar, and 1/2 cup granulated sugar until smooth.
- Add 1 large egg and 1 large egg yolk to the butter-sugar mixture and whisk until fully combined and no streaks of egg white remain. Whisk in 2 teaspoons vanilla extract.
- Add the dry ingredients to the wet ingredients and fold with a spatula until the mixture is mostly combined.
- Add 1 heaping cup dark chocolate chips and fold until a soft cookie dough forms and no dry flour remains.
- Cover the dough and refrigerate for at least 30 minutes and up to 2 days. (Dough chilled for about 30 minutes will yield flatter cookies; dough chilled 2 hours or more will yield thicker cookies.)
- When ready to bake, preheat the oven to 350°F and line two large baking sheets with parchment paper.
- If the dough is very firm from refrigeration, let it sit at room temperature 5–10 minutes to soften slightly so it can be scooped.
- Use a 2-tablespoon cookie scoop to portion the dough onto the prepared baking sheets, leaving at least 2 inches between each cookie.
- Bake one sheet at a time in the center of the oven for 9 to 11 minutes, until the cookie edges are golden brown but the tops still look pale.
- Let the cookies cool on the baking sheet for 10 minutes, then transfer them to a wire rack to cool completely.
The Upside of Chocolate Chip Cookies
These cookies are dependable. The recipe uses common pantry staples and the technique is forgiving: melted butter simplifies mixing, and the short chill window gives you control over spread and height. You can bake a tray in under 12 minutes and still have time to make a fresh batch because the dough keeps well in the fridge for up to 2 days.
Texture-wise you get a pleasing contrast — golden, slightly crisp edges with a soft, chewy center. The dark chocolate chips keep the sweetness in check and give a robust chocolate bite that pairs well with coffee or milk.
Easy Ingredient Swaps
- Butter — If you must, swap for salted butter and omit or reduce the added sea salt. Expect a slightly different texture; melted margarine will change chew and flavor.
- Sugars — You can use all brown sugar for chewier cookies or slightly more granulated sugar for crisper edges; keep total sugar roughly the same.
- Chocolate — Use semi-sweet chips, a mix of chips and chopped chocolate, or milk chocolate if you prefer a sweeter cookie. A heaping cup is the baseline.
- Flour — Stick to all-purpose for the intended texture; using a different flour will alter spread and chew.
Equipment at a Glance
- Medium mixing bowl and large mixing bowl — for dry and wet ingredient mixing.
- Whisk — to combine dry ingredients and smooth wet ingredients.
- Spatula — for folding dough without overworking it.
- 2-tablespoon cookie scoop — for uniform cookies and even baking.
- Baking sheets and parchment paper — for easy release and cleanup.
- Wire cooling rack — lets cookies cool without getting soggy.
Watch Outs & How to Fix
Here are the most common issues and quick fixes from my kitchen:
- Cookies spread too much: Chill the dough longer (2 hours) to firm up the butter, or reduce oven temperature by 5–10°F if you suspect your oven runs hot. Make sure flour is measured by spooning and leveling — too little flour causes extra spread.
- Cookies are flat and greasy: The butter might have been too hot when eggs were added; always let melted butter cool slightly. Also avoid packing the brown sugar into the cup more than called for; too much liquid sugar can make cookies greasy.
- Cookies are dry or crumbly: Don’t overbake — pull them when edges are golden and tops still look pale. Underbaking might feel wrong, but the carryover heat on the sheet finishes them gently.
- Uneven baking: Bake one sheet at a time in the center of the oven as recommended so air circulates evenly.
Substitutions by Diet
Here are diet-focused swaps that keep the spirit of the cookie without inventing complex ingredients:
- Egg-free/Vegan: Replace the 1 large egg + 1 egg yolk with an egg replacer or two commercial egg replacer servings plus an extra tablespoon of oil to mimic richness. Texture will differ slightly.
- Dairy-free: Use a dairy-free butter alternative that melts similarly; expect a change in flavor and possibly spread.
- Lower sugar: Reducing sugar will change texture and spread; try cutting granulated sugar by 25% and accept a denser cookie.
- Gluten-free: Use a one-to-one gluten-free baking flour blend designed for cookies, but be prepared for a different chew and possible need for a binder like xanthan gum if your blend lacks it.
Behind-the-Scenes Notes
I rely on a few small techniques for consistently good cookies:
- Melted butter: It speeds mixing and yields denser, chewier cookies. Let it cool slightly before adding eggs to avoid scrambling.
- Two sugars: Brown sugar brings moisture and chew; granulated sugar promotes spread and crispness. The 50/50 split here is purposeful for balance.
- Chill time: The recipe’s flexibility lets you choose: 30 minutes for flatter, slightly crisper cookies; 2 hours or up to 2 days in the fridge for thicker, chewier cookies.
- Chocolate distribution: A heaping cup of chips means you’ll get chocolate in most bites — fold gently so chips don’t sink or break up too much.
Make Ahead Like a Pro
Make-ahead options are straightforward and save time:
Short-term (within 48 hours)
Store the covered dough in the refrigerator for at least 30 minutes and up to 2 days. Chilling flavors the dough and firms it so you can bake fresh cookies on demand. If dough is very firm, let it rest 5–10 minutes before scooping.
Long-term (freezer)
Portion scoops onto a parchment-lined tray and freeze until firm. Transfer frozen dough balls to an airtight container or freezer bag for up to 3 months. Bake from frozen, adding 1–2 minutes to the bake time and watching for the same visual cues: golden edges and pale tops.
For baked cookies, cool completely and store in an airtight container at room temperature for 3–4 days, or freeze for longer storage.
Common Questions
Q: Can I use room-temperature butter instead of melted?
A: This recipe relies on melted butter for texture; room-temperature creamed butter will produce a different, cakier cookie. If you prefer creaming, use a recipe designed for that method.
Q: Why both an egg and an extra yolk?
A: The whole egg provides structure, and the extra yolk adds fat and richness for chewiness without making the cookie overly cake-like.
Q: My cookies are browned on the bottom but pale on top — are they done?
A: Check the edges — if they’re golden and the tops still look pale, they’re likely done. Let them rest on the sheet for 10 minutes; carryover heat finishes them and prevents a raw center.
Q: Can I double the recipe?
A: Yes. Mix in the same order and refrigerate in one large container or two smaller ones for easier handling. Scoop and bake as directed.
Time to Try It
Make a batch this week and note how the cookies change if you chill the dough for different lengths of time. Start with the baseline — 30 minutes for quicker baking — and try a second tray after a longer chill to see the difference in shape and chew. Keep it simple: measure flour by spooning and leveling, let melted butter cool slightly, and trust the visual cues when baking.
When you come back to this recipe, you’ll find small tweaks you prefer: a touch more chocolate, a minute less in the oven, or a different chocolate variety. Those little adjustments are part of baking that turns a reliable recipe into your favorite cookie. Enjoy.

Chocolate Chip Cookies
Ingredients
Ingredients
- 2 cupsall-purpose flour spooned and leveled
- 1 teaspoonbaking soda
- 1 teaspoonsea salt
- 3/4 cupunsalted butter 1 1/2 sticks, melted and cooled slightly
- 1/2 cuppacked brown sugar
- 1/2 cupgranulated sugar
- 1 large egg
- 1 large egg yolk
- 2 teaspoonsvanilla extract
- 1 heaping cupdark chocolate chips
Instructions
Instructions
- In a medium bowl, whisk together 2 cups all-purpose flour (spooned and leveled), 1 teaspoon baking soda, and 1 teaspoon sea salt.
- In a large bowl, whisk together 3/4 cup melted and slightly cooled unsalted butter, 1/2 cup packed brown sugar, and 1/2 cup granulated sugar until smooth.
- Add 1 large egg and 1 large egg yolk to the butter-sugar mixture and whisk until fully combined and no streaks of egg white remain. Whisk in 2 teaspoons vanilla extract.
- Add the dry ingredients to the wet ingredients and fold with a spatula until the mixture is mostly combined.
- Add 1 heaping cup dark chocolate chips and fold until a soft cookie dough forms and no dry flour remains.
- Cover the dough and refrigerate for at least 30 minutes and up to 2 days. (Dough chilled for about 30 minutes will yield flatter cookies; dough chilled 2 hours or more will yield thicker cookies.)
- When ready to bake, preheat the oven to 350°F and line two large baking sheets with parchment paper.
- If the dough is very firm from refrigeration, let it sit at room temperature 5–10 minutes to soften slightly so it can be scooped.
- Use a 2-tablespoon cookie scoop to portion the dough onto the prepared baking sheets, leaving at least 2 inches between each cookie.
- Bake one sheet at a time in the center of the oven for 9 to 11 minutes, until the cookie edges are golden brown but the tops still look pale.
- Let the cookies cool on the baking sheet for 10 minutes, then transfer them to a wire rack to cool completely.
Equipment
- Medium Bowl
- Large Bowl
- Whisk
- Spatula
- 2-tablespoon cookie scoop
- Baking Sheets
- Parchment Paper
- Oven
- Wire Rack
- Refrigerator
Notes
Yield: About 24 cookies