Weeknight Taco Braid
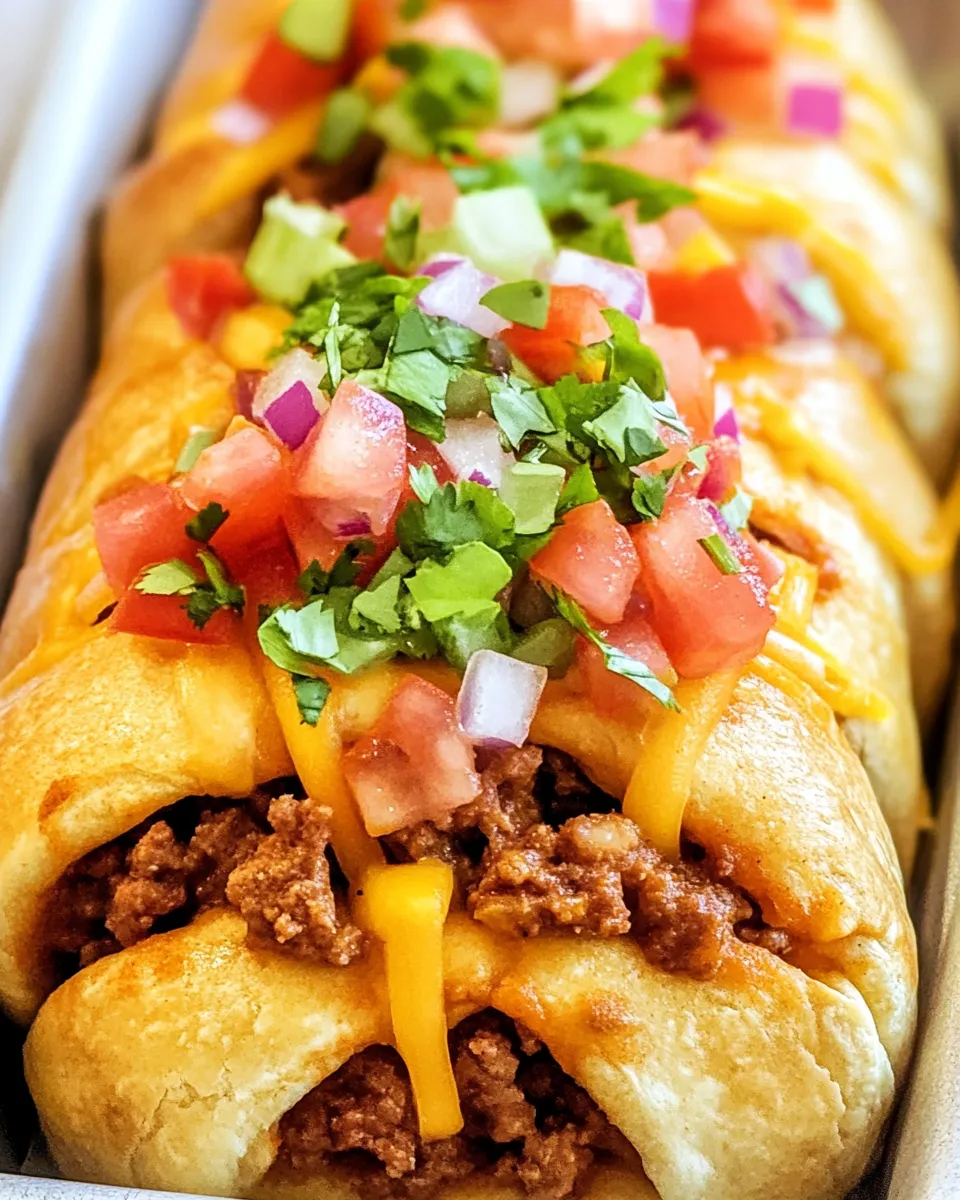
I love recipes that feel like a small, manageable celebration — dinner that looks impressive but actually comes together in under an hour. This Weeknight Taco Braid is one of those wins: familiar taco flavors tucked into a braided crescent roll that bakes golden in just 30–40 minutes. It’s the kind of dish that turns weeknight routine into something a little more fun without extra fuss.
It’s forgiving, straightforward, and built from pantry-friendly ingredients. Lean ground beef, a can of black beans, salsa, and taco seasoning form the filling; crescent roll dough and shredded cheddar hold it all together. The technique is simple: a strip of seasoned filling down the center of a sealed sheet of dough, cross-cut strips along the edges, and a quick braid that locks in the juices.
What I appreciate most is how adaptable this is to whatever you already have on hand — and how little cleanup it requires. If you want a speedy weeknight dinner that eats well as leftovers and travels easily to potlucks, this braid deserves a spot in your rotation.
Ingredient Breakdown

Ingredients
- 1 lb lean ground beef — the primary protein; browns quickly and pairs well with the taco seasoning.
- 1 (15-oz) can black beans, drained and rinsed — adds fiber, stretches the filling, and keeps it moist.
- ¾ cup salsa — provides moisture and seasoning; choose the heat level you like.
- 1 (1-oz) package taco seasoning — concentrates the taco flavor without needing multiple spices.
- 1 (8-oz) can crescent rolls — the convenient dough base that seals into a braid; press perforations to make one sheet.
- 2 cups shredded cheddar cheese, divided — melts into the filling and on top; dividing ensures cheesy pockets inside and a bubbly finish.
Make (Weeknight Taco Braid): A Simple Method
- Preheat oven to 375°F. Line a baking sheet with parchment paper and set aside.
- In a large skillet over medium-high heat, brown 1 lb lean ground beef until no longer pink. Drain excess fat and return the beef to the skillet.
- Add 1 (1-oz) package taco seasoning, 3/4 cup salsa, and 1 (15-oz) can black beans (drained and rinsed) to the beef. Stir and cook about 5 minutes, until most liquid is absorbed. Remove from heat and let cool slightly.
- Unroll the 1 (8-oz) can crescent rolls onto the prepared baking sheet without separating the pieces. Press along the perforations to seal and create one large sheet of dough.
- Spread 3/4 of the taco meat mixture down the center of the sealed dough in a long, even strip, leaving unfilled dough on both sides.
- Sprinkle 1 1/2 cups of the shredded cheddar cheese evenly over the meat strip.
- Using a sharp knife or pizza cutter, cut 10 strips on each side of the dough. Cut from the outer edge toward the filling, leaving the center filling area intact.
- Braid the dough by lifting the strips across the filling, alternating sides (right, left, right, left) and overlapping slightly so the strips meet in the center. Tuck the top and bottom ends under to seal the braid.
- Bake the braid in the preheated oven for 20 minutes, or until the crescent dough is lightly browned.
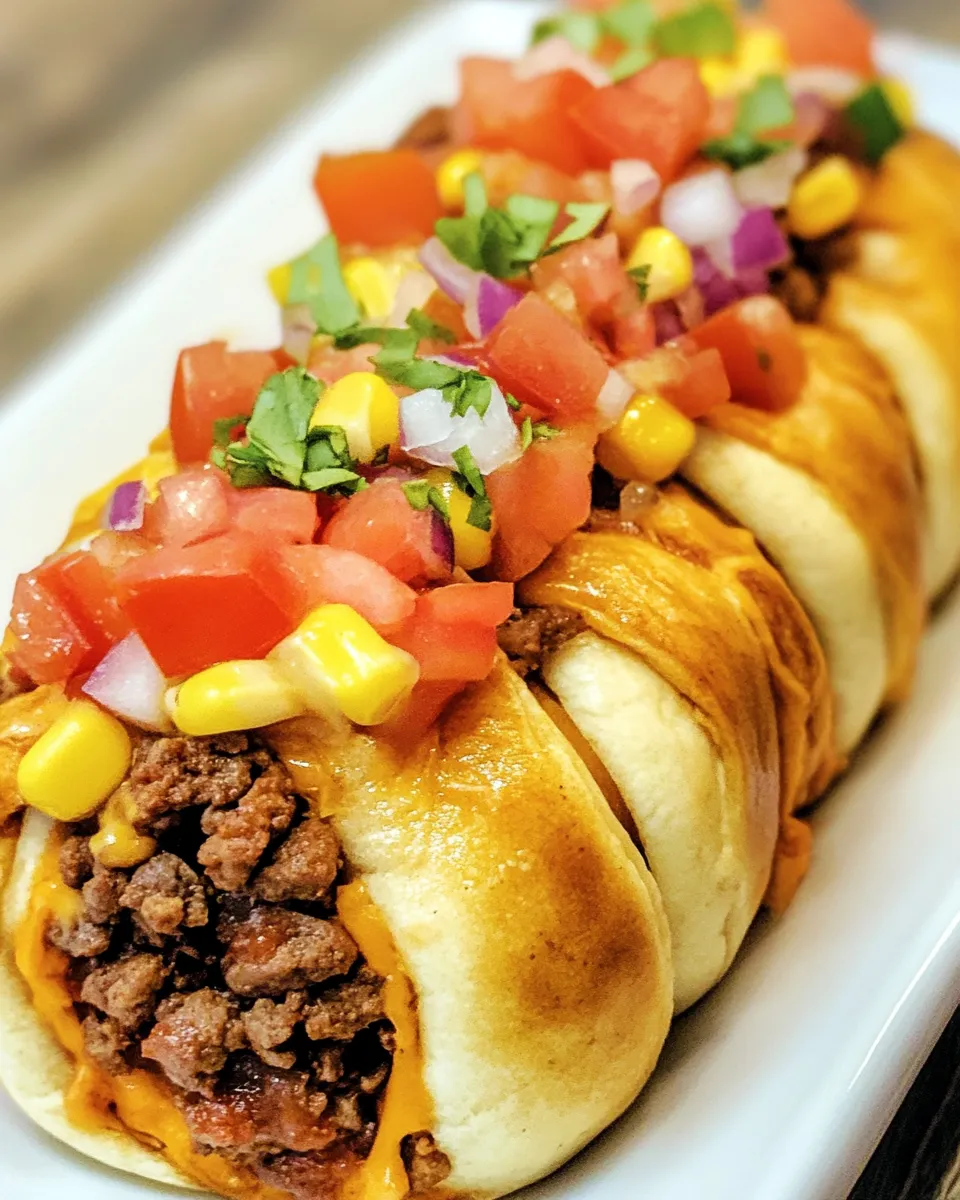
- Remove the braid from the oven. Evenly spoon the remaining 1/4 of the taco meat mixture over the top of the braid, then sprinkle with the remaining 1/2 cup shredded cheddar cheese.
- Return the braid to the oven and bake an additional 10 minutes, or until the cheese is melted and the crescent dough is golden brown. Let rest a few minutes before slicing and serving.
Why This Weeknight Taco Braid Stands Out
There are a few practical reasons this recipe has become a weekday favorite. First, the assembly is quick and intuitive: sealing the crescent dough into one sheet and braiding is easier than it looks, and it produces an attractive result every time. The braid contains the filling so you get neat slices instead of loose dinner plates.
Second, the flavor profile is instantly familiar and comforting. Taco seasoning and salsa do the heavy lifting for seasoning, so there’s no measuring out a cupboard full of spices on a busy night. The black beans add texture and bulk, which means you don’t need as much meat — efficient and satisfying.
Finally, the bake time is short. From skillet to table in under 45 minutes is realistic, and the leftovers reheat well. That convenience, combined with impressive presentation, is why this recipe works for both simple family dinners and casual gatherings.
Ingredient Swaps & Substitutions
Keep swaps minimal and sensible if you want a reliable result. A few safe adjustments using ingredients already in the recipe:
- More beans, less meat: Increase the black beans and reduce the ground beef to stretch the filling and lighten the dish without changing techniques.
- Salsa heat level: Use a milder or hotter salsa depending on who’s eating — the salsa is the main moisture and flavor source, so that swap immediately adjusts the bite.
- Cheese amount: If you prefer extra gooeyness, add a bit more of the shredded cheddar. Or reduce it if you want a lighter top.
- Dough handling: If the perforated crescent sheet seems fragile, press seams firmly and chill for 10 minutes before cutting to make cleaner strips.
Equipment & Tools
- Large skillet — for browning and finishing the meat and bean mixture.
- Baking sheet — any rimmed sheet works; the braid can be large so don’t use a small pan.
- Parchment paper — for easy transfer and cleanup, and to prevent sticking.
- Sharp knife or pizza cutter — clean cuts make the braiding step easier and neater.
- Wooden spoon or spatula — to stir the filling and spread it onto the dough.
- Can opener — for the black beans and crescent roll can.
Frequent Missteps to Avoid
These are common mistakes I see at home — and quick fixes that save the dinner.
Filling that’s too wet
If you skip the step of cooking the salsa and meat until most liquid is absorbed, the braid can get soggy and leak. Cook the filling the full 5 minutes noted in the method and let it cool slightly before assembling. That helps it stay put.
Not sealing the dough
Press the perforations firmly to create one sheet. If the seams aren’t sealed, the braid can split during baking and the filling will escape.
Cutting strips unevenly
Try to make the strips roughly the same width and length on both sides — about 10 per side as directed. Uneven strips make braiding awkward and can cause uneven browning.
Seasonal Serving Ideas
This braid is flexible throughout the year because the core flavors are neutral and crowd-pleasing. In spring and summer, serve it with a quick crisp green salad or a bowl of chilled slaw for contrast. In cooler months, pair it with a warm, simple side like roasted vegetables or seasoned rice to make the meal heartier.
If you want a lighter plate, slice the braid into narrower pieces and serve as a shareable appetizer; thicker slices make a main course. Because the filling includes salsa and beans, it stands up well to both fresh and warm accompaniments.
Recipe Notes & Chef’s Commentary
Two small details make a big difference. First: cool the filling slightly before you spread it on the dough. Hot filling can make the dough tough to braid and may cause the buttering in the crescent dough to melt too quickly. Second: divide the cheese as directed — most inside for melty pockets, some on top to create a glossy, bubbly finish.
I prefer using lean ground beef to limit excess grease, which you should drain after browning. The black beans do double duty: they keep the filling moist and reduce the total meat needed while adding texture. Finally, tuck the braid ends under neatly to contain the filling and create a polished look when you slice.
Make Ahead Like a Pro
You can prepare the filling and the assembled braid ahead of time with minimal loss of quality. Assemble the braid on the parchment-lined sheet, then cover tightly with plastic wrap and refrigerate for up to 24 hours. When ready to bake, remove the wrap, let the braid sit at room temperature for 10–15 minutes, then follow the baking steps as written (you may need an extra 2–4 minutes if it’s very cold).
For longer storage, the cooked braid freezes well. Bake fully, cool, wrap tightly, and freeze. Reheat covered in a 325°F oven until warmed through; finish uncovered for a few minutes to refresh the crust. Reheating in slices in a toaster oven works well for single portions.
Common Questions
Q: Can I make this vegetarian?
A: Yes — increase the black beans and omit the ground beef. The beans will make the filling denser, so you might loosen it slightly with a splash more salsa if needed.
Q: Will the crescent dough hold up with a lot of filling?
A: It will, if you don’t overload it. Follow the filling quantities and leave space on each side for the strips. Press the seams to seal, and tuck the ends under to contain the mixture.
Q: Can I prep this for a party?
A: Absolutely. Make the braid earlier in the day or the night before, refrigerate, then bake right before guests arrive. Slice just before serving for the best presentation.
Time to Try It
This Weeknight Taco Braid is a practical, crowd-pleasing solution for busy evenings when you want something tasty and straightforward. It looks special, but it’s forgiving enough for a hurried cook — and it travels well if you need to bring a dish to share. Follow the method, keep the filling from getting too wet, and enjoy how a simple braid can elevate taco night without adding time or complexity.
If you make it, slice it warm and pay attention to the little pockets of melted cheddar — that’s the best part. Let me know how it turns out and what small swaps you tried so I can add them to future tweaks.

Weeknight Taco Braid
Ingredients
Ingredients
- 1 lblean ground beef
- 1 15-ozcan black beans, ,drained and rinsed
- 3/4 cupsalsa
- 1 1-ozpackage taco seasoning
- 1 8-ozcan crescent rolls
- 2 cupsshredded cheddar cheese ,divided
Instructions
Instructions
- Preheat oven to 375°F. Line a baking sheet with parchment paper and set aside.
- In a large skillet over medium-high heat, brown 1 lb lean ground beef until no longer pink. Drain excess fat and return the beef to the skillet.
- Add 1 (1-oz) package taco seasoning, 3/4 cup salsa, and 1 (15-oz) can black beans (drained and rinsed) to the beef. Stir and cook about 5 minutes, until most liquid is absorbed. Remove from heat and let cool slightly.
- Unroll the 1 (8-oz) can crescent rolls onto the prepared baking sheet without separating the pieces. Press along the perforations to seal and create one large sheet of dough.
- Spread 3/4 of the taco meat mixture down the center of the sealed dough in a long, even strip, leaving unfilled dough on both sides.
- Sprinkle 1 1/2 cups of the shredded cheddar cheese evenly over the meat strip.
- Using a sharp knife or pizza cutter, cut 10 strips on each side of the dough. Cut from the outer edge toward the filling, leaving the center filling area intact.
- Braid the dough by lifting the strips across the filling, alternating sides (right, left, right, left) and overlapping slightly so the strips meet in the center. Tuck the top and bottom ends under to seal the braid.
- Bake the braid in the preheated oven for 20 minutes, or until the crescent dough is lightly browned.
- Remove the braid from the oven. Evenly spoon the remaining 1/4 of the taco meat mixture over the top of the braid, then sprinkle with the remaining 1/2 cup shredded cheddar cheese.
- Return the braid to the oven and bake an additional 10 minutes, or until the cheese is melted and the crescent dough is golden brown. Let rest a few minutes before slicing and serving.
Equipment
- Cookie Sheet
- Parchment Paper
- Chef Knives
- Rotary Cheese Grater
Notes
I prefer to use a can of the crescent sheet dough instead of crescent rolls.
You can make the taco filling ahead of time and assemble the braid when ready to bake.
Here is our recipe for Homemade Taco Seasoning made with chili powder, garlic powder, onion powder, red pepper flakes, oregano, paprika, cumin, salt, and pepper:https://www.plainchicken.com/homemade-taco-seasoning/
Here is our recipe for Homemade Restaurant-Style Salsa:https://www.plainchicken.com/superior-grill-salsa/
Our favorite store-bought salsas are Mateo’s, Kylito’s, Pace Picante Sauce, and Pace Restaurant Style Salsa. I find them at Walmart.
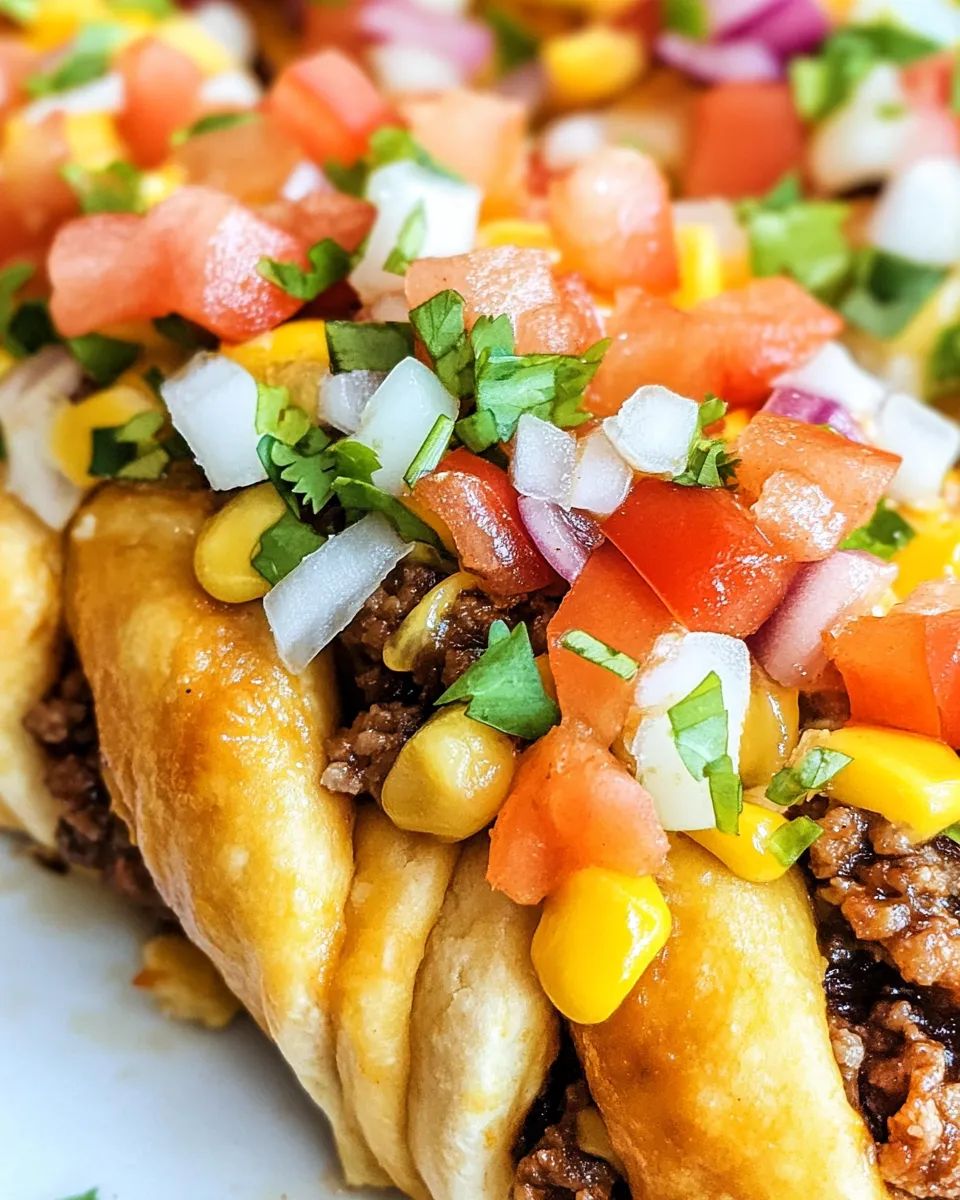
Feel free to throw in some corn, onions, or peppers into the meat mixture.
I like to save a little of the filling and spread it on top of the braid while it is cooking. Cook the braid first and the extra filling on top during the last 10 minutes of baking. If you put it on top before baking, the dough won’t cook all the way through.