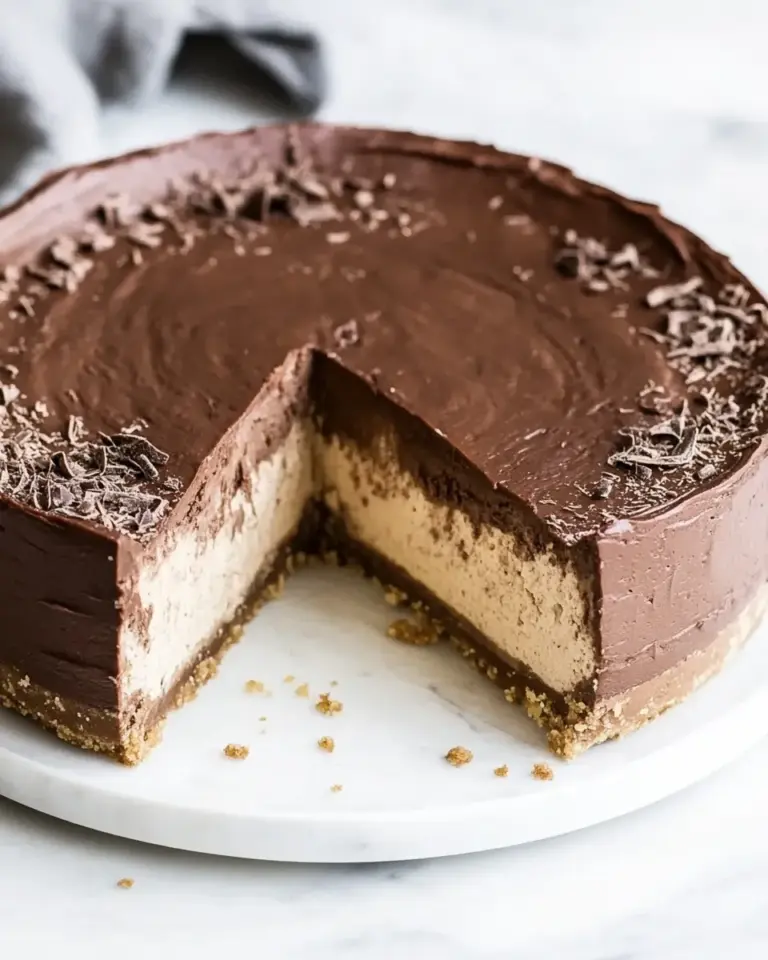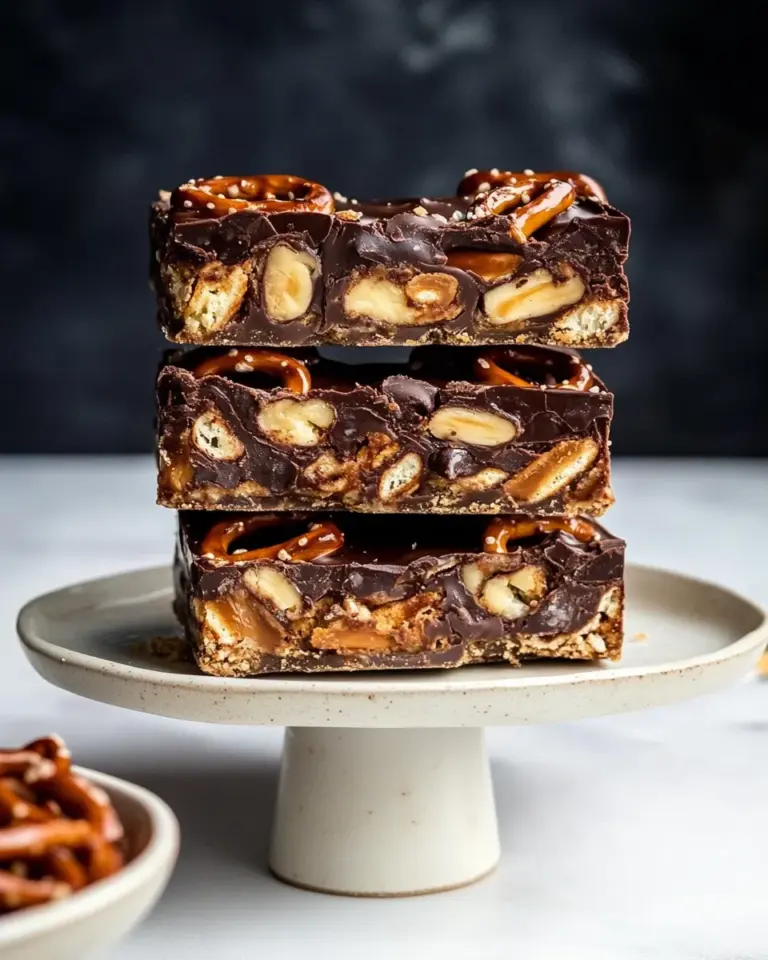
Chocolate Toffee Wedges
These Chocolate Toffee Wedges are the kind of dessert I turn to when I want something that looks elegant but doesn’t demand all evening in the kitchen. The base bakes into a sturdy, tender layer, the chocolate ganache sets glossy and smooth, and the toffee pieces add that irresistible crunch and caramel saltiness. They slice into neat wedges that travel well, freeze well, and always disappear fast.
I like them for parties, potlucks, and for keeping a small pan in the fridge for when a chocolate craving hits. The technique is straightforward: a shortbread-like crust, a quick ganache, a scatter of toffee, and some patience while it sets. If you follow the steps, you’ll get consistently tidy wedges that hold their shape without crumbling.
No special skills are required, but a few small habits make a big difference: measure flour properly, don’t overmix the dough, and let the chocolate fully set before cutting. I’ll walk you through the exact steps, the tools I reach for, common mistakes and fixes, and ways to serve these all year round.
Ingredient Notes

Below I break down what each ingredient does and a practical tip so you get the best results. Keep the ingredient list close while you measure—precision at the start makes slicing and texture consistent at the finish.
Ingredients
- ½ cup (1 stick) unsalted butter, at room temperature — Gives the crust richness and tenderness; room temperature ensures it creams smoothly with the sugar.
- ½ cup firmly packed dark brown sugar — Adds moisture and a deeper, caramel-like flavor to the crust compared with white sugar.
- ¼ teaspoon salt — Enhances the chocolate and balances the sweetness; measure carefully if using salted butter.
- 1 large egg yolk — Binds the dough and keeps the crust tender without adding extra liquid from the white.
- ½ teaspoon vanilla extract — Boosts overall flavor; use pure vanilla for best aroma.
- 1 cup all purpose flour — The structure of the crust; spoon and level to avoid a dense base.
- 5 ounces bittersweet or semisweet chocolate, chopped — Melts into the ganache; bittersweet gives a less sweet, more chocolate-forward finish.
- 3 tablespoons heavy whipping cream — Thins and enriches the melted chocolate into a shiny ganache.
- ½ cup packaged toffee pieces (or chopped Heath or Skor bar) — Provides crunch and caramel flavor; scatter right after spreading the ganache so they adhere.
Chocolate Toffee Wedges: How It’s Done
- Position a rack in the middle of the oven and heat to 350°F (175°C). Lightly grease the bottom and sides of a 9½-inch tart pan with a removable bottom.
- In a large bowl, use an electric mixer to beat ½ cup (1 stick) unsalted butter (room temperature), ½ cup firmly packed dark brown sugar, and ¼ teaspoon salt on medium speed until well blended, about 1–2 minutes.
- Add 1 large egg yolk and ½ teaspoon vanilla extract and beat just until combined.
- Reduce mixer speed to low and add 1 cup all-purpose flour. Mix until the dough begins to clump together and holds when pressed, about 30–45 seconds. Do not overmix.
- Scrape the dough into the prepared tart pan. Using lightly floured fingertips if the dough is sticky, gently pat the dough into an even layer on the bottom only (do not press up the sides). Smooth the surface so the layer is uniform.
- Bake on the middle rack until the top looks dry and the dough begins to pull away slightly from the sides of the pan, 25–27 minutes. Remove from the oven and transfer the pan to a wire rack.
- While the crust bakes, place 5 ounces bittersweet or semisweet chocolate (chopped) and 3 tablespoons heavy whipping cream in a heatproof bowl. Melt together using a double boiler or in the microwave in 30-second bursts, stirring well after each burst, until the mixture is smooth and glossy.
- Pour the warm chocolate ganache over the warm crust and spread evenly, leaving about a ½-inch border around the edge. An offset spatula or the back of a spoon works well.
- Immediately scatter ½ cup packaged toffee pieces evenly over the ganache and gently press them into the chocolate so they adhere.
- Let the tart cool completely until the chocolate is fully set: about 4 hours at room temperature or about 2 hours in the refrigerator.
- Once set, remove the outer ring of the tart pan. Use a sharp knife to cut the tart into 16 wedges.
- Serve the chocolate toffee wedges chilled or at room temperature.
Why This Recipe Works

Three simple layers are working together here: a tender, shortbread-like base; a glossy chocolate ganache; and crunchy toffee on top. The crust is low in liquid and high in fat, so it bakes firm enough to be sliced but remains tender rather than cakey. The egg yolk binds without making the dough tough.
The ganache uses a small ratio of cream to chocolate, which yields a thick, spreadable finish that sets firm but not brittle. That balance is crucial—too much cream and the ganache won’t set cleanly; too little and it won’t spread smoothly. Scattering the toffee while the ganache is warm locks the pieces in place and lets them sink slightly so each wedge cuts cleanly without the toffee falling off.
No-Store Runs Needed
If you keep basic baking supplies on hand—butter, flour, eggs, sugar, chocolate and a little cream—this recipe requires no surprise errands. Packaged toffee pieces are optional if you have a few Heath or Skor bars on the shelf; just chop them up. The rest are pantry staples that most home bakers already have, so you can usually pull this together from what’s in the kitchen.
Tools of the Trade
- 9½-inch tart pan with removable bottom — Essential for getting neat wedges and for removing the outer ring easily.
- Electric mixer — Makes creaming the butter and sugar quick and even, though you can work by hand if needed.
- Heatproof bowl and double boiler or microwave — For melting the chocolate and cream safely until glossy.
- Offset spatula or back of a spoon — For spreading the ganache evenly.
- Sharp knife — For clean slices once the chocolate has set. Warm the knife under hot water and wipe dry between cuts for extra-smooth edges.
- Wire rack — To cool the tart evenly after baking the crust.
Learn from These Mistakes
Common slip-ups are easy to avoid.
- Overmixing the dough: Mixing the flour in too long develops gluten and makes the crust tough. Mix just until the dough clumps and holds when pressed, as directed.
- Pressing dough up the sides: The recipe instructs to pat the dough only on the bottom. Pressing up the sides changes the baking time and can cause an uneven thickness, which affects both texture and how the ganache spreads.
- Spreading cold ganache: If the ganache cools too much it won’t spread smoothly and won’t let the toffee adhere. Work while it’s warm and glossy.
- Cutting before fully set: Chocolate that isn’t fully set will smear and the wedges won’t hold their shape. Wait the full setting time.
- Using a dull knife: A dull blade tears the crust and drags toffee. Use a sharp knife and wipe it clean between cuts for tidy wedges.
Seasonal Serving Ideas
These wedges are flexible and suit every season. In winter, serve them slightly chilled alongside hot coffee or mulled wine. In spring and summer, pair them with fresh berries or a scoop of vanilla ice cream for contrast between rich chocolate and bright fruit. For holiday gatherings, garnish each wedge with a light dusting of cocoa, a sprinkle of flaky sea salt, or a tiny piece of candied orange for a festive touch.
Cook’s Notes
Room temperature butter makes creaming easier, so pull it out at least 30 minutes before you start. If your kitchen is cold, give the ganache a few gentle stirs to keep it glossy while you spread it. When pressing the toffee, be gentle—just enough so it adheres. If the toffee starts to dissolve into the chocolate, the ganache was likely too hot; allow it to cool a minute next time.
To get perfectly even wedges, score the set chocolate lightly with a sharp knife into 16 equal sections before cutting through. This prevents chipping and helps guide the blade.
Shelf Life & Storage
Store the wedges in an airtight container. At room temperature they will keep for about 3–4 days; in the refrigerator they keep for up to 2 weeks. For longer storage, wrap individual wedges tightly and freeze for up to 3 months. Thaw in the refrigerator or at room temperature before serving. Chilled wedges are firmer and easier to transport; room-temperature wedges show more chocolate flavor and a softer mouthfeel.
Questions People Ask
Can I use milk chocolate instead of bittersweet or semisweet?
Yes. Milk chocolate will make the topping sweeter and softer. The ganache may set slightly softer, so refrigerate longer before slicing if needed.
What if I only have salted butter?
You can use salted butter but reduce or omit the added ¼ teaspoon salt. Taste the dough if unsure—salty butter brands vary.
Can I make this in a different pan?
A tart pan with removable bottom is ideal for clean removal. If you don’t have one, line a round cake pan with parchment, leaving an overhang to lift the tart out after setting.
Why did my ganache seize?
Seizing happens when water contacts the chocolate. Make sure all tools are dry and avoid steam when melting over a double boiler. If it seizes slightly, whisk in a tiny bit more warm cream to bring it back together.
How do I get clean slices?
Use a very sharp knife, warm it under hot water, wipe dry, and slice. Wipe the blade between cuts. Letting the chocolate fully set is also essential for clean edges.
The Takeaway
Chocolate Toffee Wedges are a reliable, crowd-pleasing bake: a tender, buttery base, a shiny chocolate layer, and generous crunchy toffee. The method is simple, the components are familiar, and the result is impressive without being fussy. Follow the steps exactly—especially the mixing, spreading, and setting times—and you’ll have neat, delicious wedges that keep well and suit any occasion.

Chocolate Toffee Wedges
Ingredients
Ingredients
- 1/2 cup 1 stickunsalted butter, at room temperature
- 1/2 cupfirmly packed dark brown sugar
- 1/4 teaspoonsalt
- 1 largeegg yolk
- 1/2 teaspoonvanilla extract
- 1 cupall purpose flour
- 5 ouncesbittersweet or semisweet chocolate chopped
- 3 tablespoonsheavy whipping cream
- 1/2 cuppackaged toffee pieces or chopped Heath or Skor bar
Instructions
Instructions
- Position a rack in the middle of the oven and heat to 350°F (175°C). Lightly grease the bottom and sides of a 9½-inch tart pan with a removable bottom.
- In a large bowl, use an electric mixer to beat ½ cup (1 stick) unsalted butter (room temperature), ½ cup firmly packed dark brown sugar, and ¼ teaspoon salt on medium speed until well blended, about 1–2 minutes.
- Add 1 large egg yolk and ½ teaspoon vanilla extract and beat just until combined.
- Reduce mixer speed to low and add 1 cup all-purpose flour. Mix until the dough begins to clump together and holds when pressed, about 30–45 seconds. Do not overmix.
- Scrape the dough into the prepared tart pan. Using lightly floured fingertips if the dough is sticky, gently pat the dough into an even layer on the bottom only (do not press up the sides). Smooth the surface so the layer is uniform.
- Bake on the middle rack until the top looks dry and the dough begins to pull away slightly from the sides of the pan, 25–27 minutes. Remove from the oven and transfer the pan to a wire rack.
- While the crust bakes, place 5 ounces bittersweet or semisweet chocolate (chopped) and 3 tablespoons heavy whipping cream in a heatproof bowl. Melt together using a double boiler or in the microwave in 30-second bursts, stirring well after each burst, until the mixture is smooth and glossy.
- Pour the warm chocolate ganache over the warm crust and spread evenly, leaving about a ½-inch border around the edge. An offset spatula or the back of a spoon works well.
- Immediately scatter ½ cup packaged toffee pieces evenly over the ganache and gently press them into the chocolate so they adhere.
- Let the tart cool completely until the chocolate is fully set: about 4 hours at room temperature or about 2 hours in the refrigerator.
- Once set, remove the outer ring of the tart pan. Use a sharp knife to cut the tart into 16 wedges.
- Serve the chocolate toffee wedges chilled or at room temperature.
Equipment
- 9 1/2-inch tart pan with removable bottom
- Electric Mixer
- Mixing Bowl
- Wire Rack
- Heatproof Bowl
- Double boiler or microwave-safe bowl
- offset spatula or spoon
- Sharp Knife