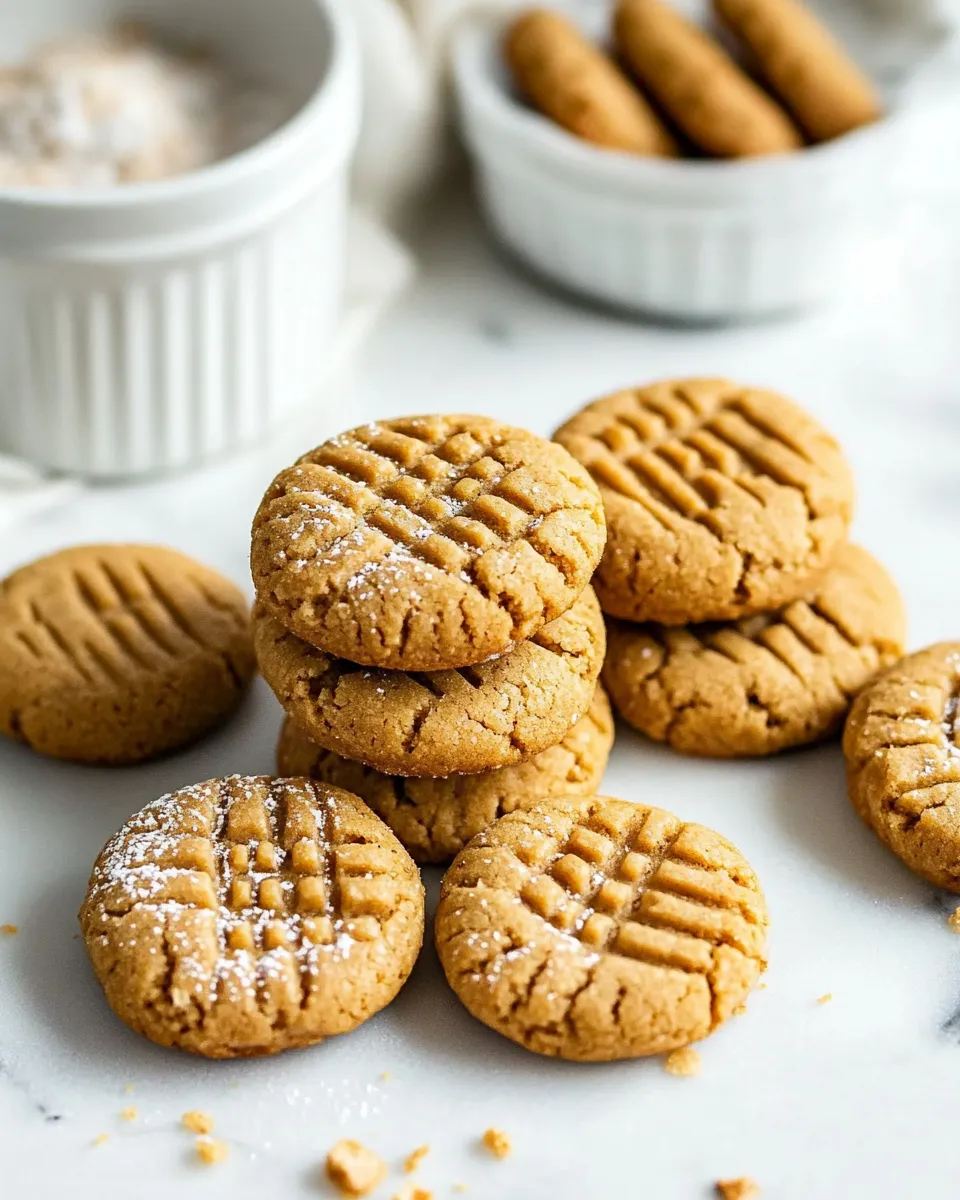
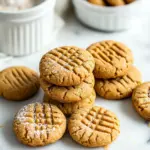
3 Ingredient Peanut Butter Cookies
These cookies are about as honest as baking gets: three pantry staples, a few minutes of mixing, and a single tray in the oven. No chilling, no rolling, no fuss. If you want a dependable cookie that tastes like straight-up peanut butter, this is it.
I test recipes until they behave predictably. This one does. The dough is forgiving, the bake window is short, and the result is a tender, slightly crinkled cookie with clear peanut flavor. Perfect for when you want something homemade without hauling out half your kitchen.
Below you’ll find a precise ingredient checklist, the exact step-by-step guide, troubleshooting tips, and sensible ways to store and reheat. Everything is practical, because you want a good cookie—and you want it fast.
Ingredient Checklist

- 1 cup creamy peanut butter — provides the fat, flavor, and structure; creamy gives a smooth texture and predictable dough consistency.
- 1 cup granulated sugar — sweetens and helps with a slightly crisp exterior; granulated sugar encourages the classic criss-cross texture when pressed.
- 1 large egg — binds the ingredients and adds lift; it turns the simple mix into a cohesive dough that bakes into tender cookies.
3 Ingredient Peanut Butter Cookies Cooking Guide
- Preheat oven to 350 degrees F and place a rack in the center. Line a large baking sheet with parchment paper or a silicone baking mat; set aside.
- In a large bowl combine 1 cup creamy peanut butter, 1 cup granulated sugar, and 1 large egg. Mix with an electric mixer on low–medium or stir with a sturdy spatula until the ingredients are fully combined and the mixture is smooth, scraping the bowl sides as needed.
- Use a tablespoon or small cookie scoop to portion the dough (about 1 tablespoon per cookie). Roll each portion into a ball and place on the prepared baking sheet; because these cookies do not spread much, you can place them close together (about 1 inch apart).
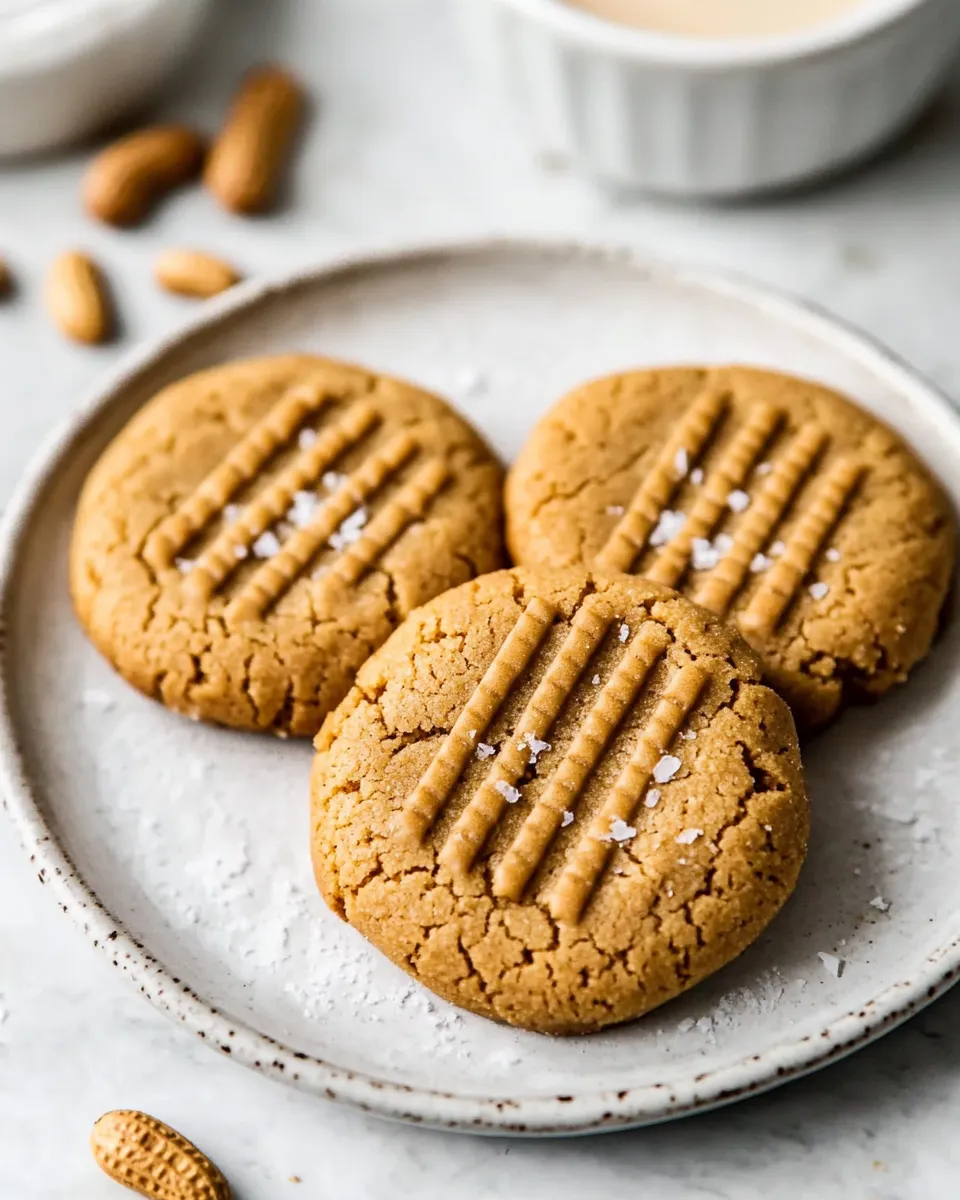
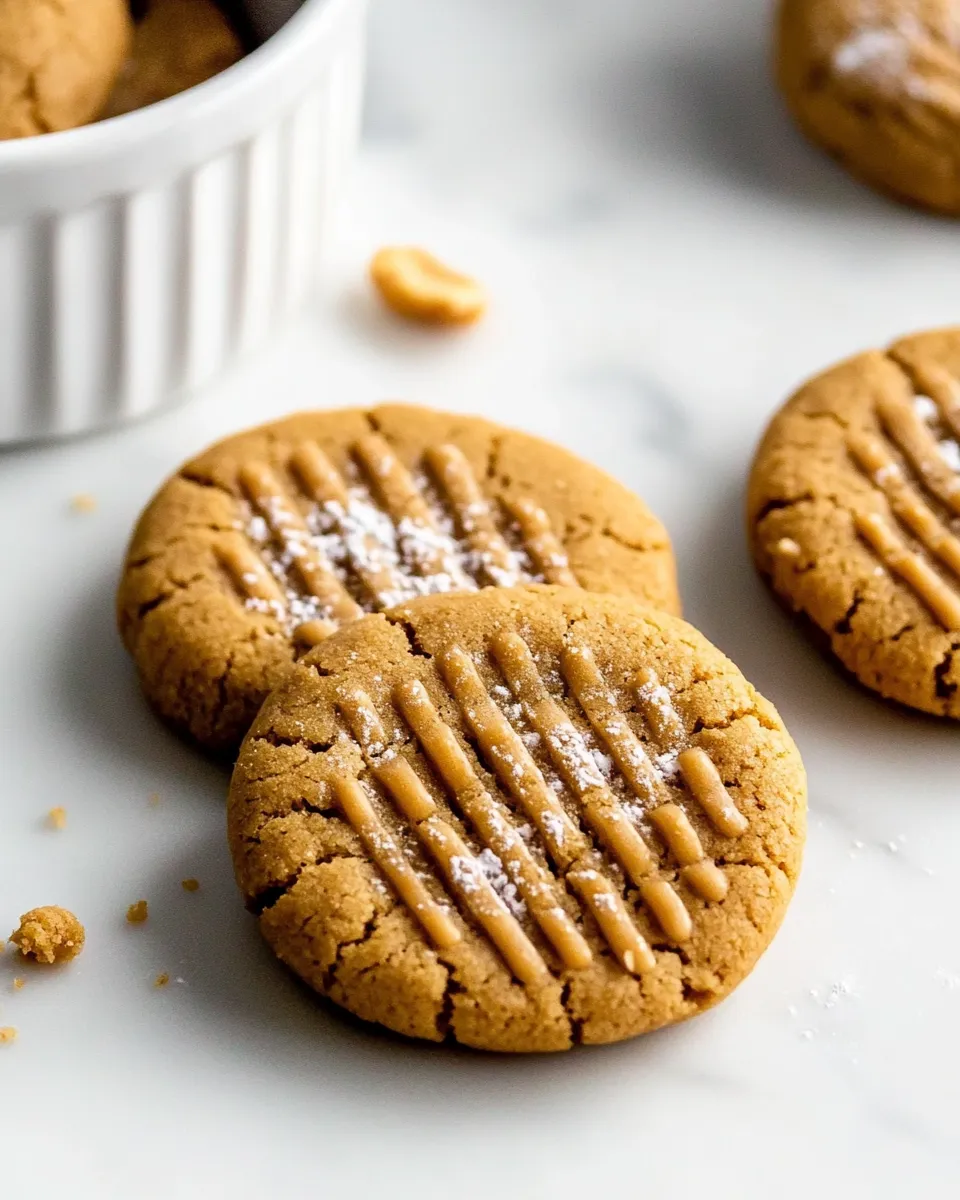
- Flatten each ball with the back of a fork, making a criss-cross pattern and pressing the cookies to about 1/4 inch thickness.
- Bake for 8 to 10 minutes, or until the edges are just slightly golden. Avoid overbaking.
- Remove the baking sheet from the oven and let the cookies cool on the sheet for 3 minutes, then transfer the cookies to a wire rack to cool completely.
What Sets This Recipe Apart
There are two things that make these cookies stand out: radical simplicity and predictability. With just three ingredients, there’s nowhere for things to hide. Each component is doing a clear job—peanut butter for flavor and fat, sugar for structure and bite, egg for glue. Because the formula is so compact, small changes in technique have predictable effects.
Another practical advantage: the dough doesn’t spread much. That makes it forgiving for home bakers who may not level racks perfectly or who don’t have an oven thermometer. You can put the tray in and know the cookies will hold their shape. That same trait also means you get a reliably nutty, slightly chewy center with a delicate edge—no guesswork.
Texture-Safe Substitutions
If you need to adjust for what’s in your pantry, there are safe swaps that won’t derail the texture, but they do require a little awareness:
- Switching the type of peanut butter will change behavior. Creamy peanut butter provides consistent fat and a smooth dough. Natural peanut butter—where oil separates—can make the dough looser; stir it thoroughly and, if needed, chill the dough briefly to firm it.
- Chunky peanut butter will add pockets of crunch. The dough will be slightly more uneven but still bakes reliably; expect more textural contrast in each bite.
- If you must change the sweetener, be cautious: coarser or more hygroscopic sugars alter crispness and spread. Granulated sugar in this recipe supports that classic fork criss-cross and a lightly crisp edge.
Tools of the Trade
- Baking sheet — a sturdy, rimmed sheet keeps cookies flat and prevents spills.
- Parchment paper or silicone baking mat — prevents sticking and makes cleanup instant.
- Electric mixer or sturdy spatula — an electric mixer speeds things up; a firm spatula works fine if you have good elbow grease.
- Tablespoon or small cookie scoop — for even portions so cookies bake uniformly.
- Fork — used to flatten and create the classic criss-cross pattern.
- Wire rack — cooling on a rack stops the bottoms from steaming and keeps texture right.
Mistakes Even Pros Make
- Overbaking. These cookies finish very quickly. Edges should be just slightly golden—if the centers turn dark you’ve gone too far. Pull them at the first sign of color and let residual heat finish the bake on the sheet.
- Using un-stirred natural peanut butter. If the oil is separated, the dough will be greasy and may spread unpredictably. Always stir natural spreads until homogeneous.
- Not flattening the dough enough. Because the cookies don’t spread, failing to press them to an even 1/4 inch thickness yields dense, underbaked middles. A firm press with a fork evens them out and shortens bake time.
- Placing cookies too far apart (or too close). While these don’t need a lot of space, crowding makes transfer awkward. Leaving roughly an inch between pieces keeps handling tidy.
- Skipping the parchment or mat. These cookies can stick slightly if baked directly on metal; a liner prevents tearing and promotes even bottom browning.
Variations by Season
You don’t need new ingredients to tailor these to the time of year. Small technique changes tune texture and serving style without altering the recipe list.
Summer: bake closer to the shorter end of the time range for a softer, chewier cookie that’s pleasant with an iced drink. Let them cool fully on a rack so they don’t feel sticky in warm kitchens.
Fall and Winter: if you want a slightly sturdier cookie for assembling or gifting, press a little thinner and bake to the higher end of the window for a touch more bite. Cool completely before stacking to avoid trapping steam.
Holiday gatherings: make them ahead and store in a single layer or wrapped between sheets so edges stay intact. They travel well because they’re compact and not overly fragile.
Notes on Ingredients
Peanut butter: the word “creamy” matters because it signals a consistent fat content and a homogenous texture that this dough relies on. Some commercial creamy butters contain stabilizers; others are simple blends of peanuts and oil—both work, but they behave slightly differently. If your peanut butter is very soft at room temperature, you may find the dough a touch looser; a short rest in the fridge firms it up.
Sugar: granulated sugar plays a structural role here. It melts and recrystallizes slightly as the cookie cools, producing those lightly firm edges. Using powdered sugar or a liquid sweetener will change both texture and the way the dough holds together.
Egg: a single egg is enough to bind this small batch. If your egg is very large or small compared to standard sizing, the dough texture will only shift subtly; watch for moisture and adjust handling rather than altering the recipe.
Store, Freeze & Reheat
Storage: keep fully cooled cookies in an airtight container at room temperature. They stay best for about 3 to 5 days; after that they begin to lose their fresh-baked texture.
Freezing: these cookies freeze well. Arrange them in a single layer on a baking sheet, freeze until firm, then transfer to a sealed container or freezer bag with layers separated by parchment. Frozen cookies can keep up to 3 months without significant quality loss.
Reheat: to refresh a slightly stale or chilled cookie, warm in a 300°F oven for 5–7 minutes until the center softens and the edges regain a slight crisp. A quick 10–15 second zap in the microwave will warm one cookie, but it won’t restore edge crunch.
Reader Questions
Q: Can I use natural peanut butter? A: Yes, but stir it well. Natural brands often separate, and the extra oil affects dough consistency. If the dough is loose, chill it briefly before scooping.
Q: Are these gluten-free? A: As written, yes—there’s no wheat in the ingredient list. Check your peanut butter label for cross-contamination if you need strict gluten-free assurance.
Q: Can I double the recipe? A: Absolutely. Multiply ingredients evenly and mix in a larger bowl. Bake on multiple sheets, swapping racks as needed for even heat.
Q: How do I get them chewier? A: Bake toward the shorter end of the time window and keep them slightly thicker when pressing. Let them cool on the sheet for the full 3 minutes so centers finish gently.
Q: How do I get them crisper? A: Flatten a bit thinner and bake to the higher end of the 8–10 minute range, watching closely so they don’t brown too much.
The Last Word
Three ingredients, minimal time, and consistently good results—that’s the appeal here. These cookies are a practical favorite: quick to mix, easy to teach, and simple to share. Try a batch today; learn how your oven behaves with them, and you’ll have a go-to cookie whenever you need a fast, honest treat.
3 Ingredient Peanut Butter Cookies
Ingredients
Ingredients
- 1 cupcreamy peanut butter
- 1 cupgranulated sugar
- 1 large egg
Instructions
Instructions
- Preheat oven to 350 degrees F and place a rack in the center. Line a large baking sheet with parchment paper or a silicone baking mat; set aside.
- In a large bowl combine 1 cup creamy peanut butter, 1 cup granulated sugar, and 1 large egg. Mix with an electric mixer on low–medium or stir with a sturdy spatula until the ingredients are fully combined and the mixture is smooth, scraping the bowl sides as needed.
- Use a tablespoon or small cookie scoop to portion the dough (about 1 tablespoon per cookie). Roll each portion into a ball and place on the prepared baking sheet; because these cookies do not spread much, you can place them close together (about 1 inch apart).
- Flatten each ball with the back of a fork, making a criss-cross pattern and pressing the cookies to about 1/4 inch thickness.
- Bake for 8 to 10 minutes, or until the edges are just slightly golden. Avoid overbaking.
- Remove the baking sheet from the oven and let the cookies cool on the sheet for 3 minutes, then transfer the cookies to a wire rack to cool completely.
Equipment
- Large Bowl
- Electric Mixer (Optional)
- sturdy spatula
- Baking Sheet
- Parchment paper or silicone baking mat
- tablespoon or small cookie scoop
- Fork
- Wire Rack
Notes
Store the cooled cookies in an airtight container on the counter for up to 4 days. You can also freeze the cookies for up to 3 months.