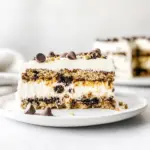
Chocolate Chip Cookie Icebox Cake
No-bake icebox cake layered with chocolate chip cookies and a vanilla pudding–whipped topping mixture. Chill until cookies soften and the cake sets.
Servings: 16 servings
Ingredients
Ingredients
- 1 18.2-ounce packagechocolate chip cookiessee note 1
- 2 3.4-ounce packagesinstant vanilla pudding mixsee note 2
- 2-1/4 cupswhole milk
- 1 8-ounce containerfrozen whipped toppingthawed, divided, see note 3
Instructions
Instructions
- Line an 8×8-inch pan with parchment paper, leaving an overhang on two opposite sides for easy removal. Set the pan aside.
- From the thawed 8-ounce container of whipped topping, scoop out and reserve 1/2 cup in a small bowl; set that reserved portion aside. Use the remaining whipped topping in the next step.
- In a large bowl, add both 3.4-ounce instant vanilla pudding mixes and 2 1/4 cups whole milk. Whisk briskly for about 1 minute, until the mixture is smooth and begins to thicken.
- Gently fold the remaining whipped topping (the portion not reserved) into the pudding mixture until fully incorporated and uniform in texture.
- Place an even layer of chocolate chip cookies in the bottom of the prepared pan, breaking cookies as needed to fit and cover the surface.
- Spoon half of the pudding–whipped mixture over the cookie layer and use the back of a large spoon to spread it into an even layer.
- Add a second layer of chocolate chip cookies to cover the pudding layer.
- Spoon the remaining half of the pudding–whipped mixture over the second cookie layer and spread it evenly.
- Arrange a final layer of chocolate chip cookies on top to cover the pudding layer.
- Spread the reserved 1/2 cup whipped topping in an even layer over the top cookie layer.
- Cover the pan and refrigerate for at least 8 hours (or overnight) so the cookies soften and the cake sets.
- When ready to serve, use the parchment overhang to lift the cake from the pan and cut into squares. If desired, crumble a few extra cookies from the package over the squares as a garnish.
Equipment
- 8 x 8-inch baking panlined
Notes
Recipe Notes
Note 1:
You’ll need a lot of cookies for this cake, so make sure to get the family-sized box (18-ounce) instead of the original (13-ounce) size. When it comes to the type of cookies, avoid soft or chewy cookies. I prefer Chips Ahoy original Chocolate Chip Cookies.
Note 2:
Use two boxes of regular instant pudding mix—not sugar-free, low-fat, or cook-and-serve. Be sure to get the small 3.4-ounce boxes. When using the pudding mix, follow my recipe directions—don’t prepare it according to package instructions.
Note 3:
Cool Whip is a common brand of frozen whipped topping and the one I use in the test kitchen. Be sure to use regular, not sugar-free or reduced-fat, which can become watery. You can also make your own; the recipe for homemade whipped cream is in the blog post!
Note 4:
When cutting the cake, use a sharp chef’s knife and make decisive cuts. Run the knife under warm water and dry it on a kitchen towel before cutting and repeat for each slice.
Storage
:
I recommend eating the cake on days 2 or 3. It needs 12 hours to soften properly, but it can become watery after several days. To store the cake, serve it directly from the fridge. Any leftovers should be returned to the fridge promptly. Freezing is not recommended.